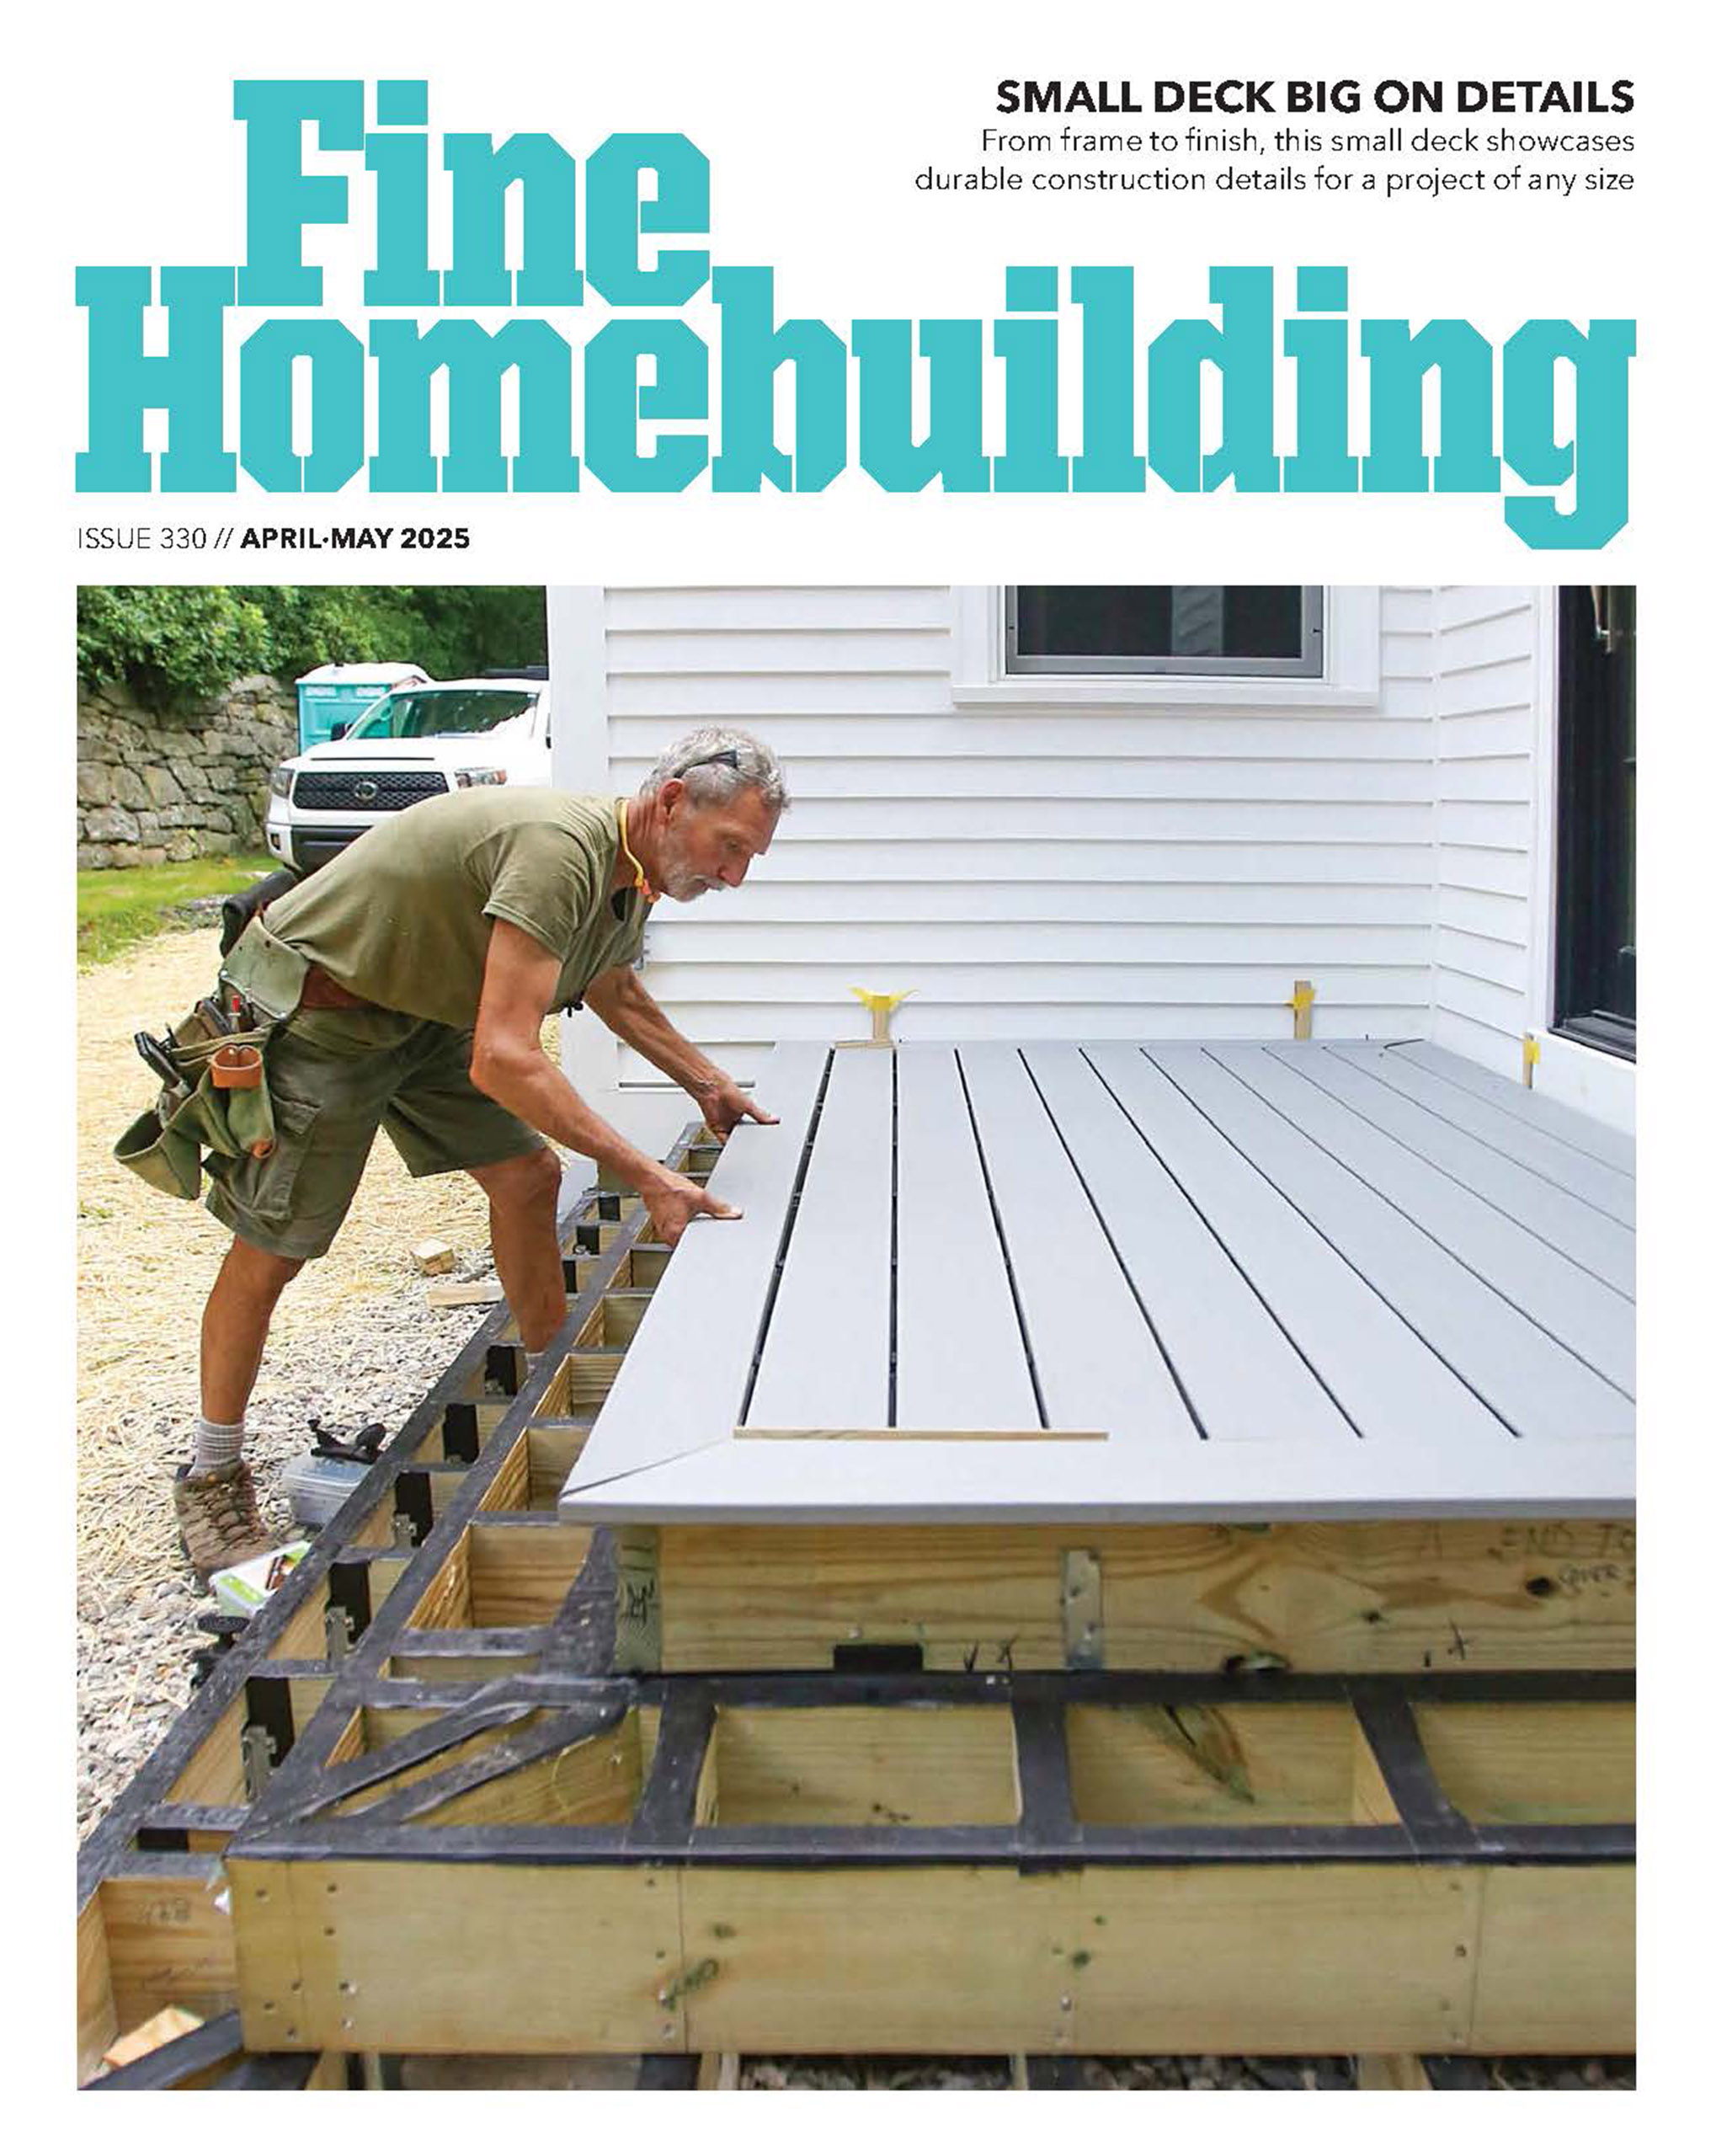
Repairing a Modern Window Sash
Contrary to popular belief, many of today's windows can be fixed with new shop-made parts, wood patches, epoxy putty, and other common techniques.

Tom Gensmer shares his expertise in repairing contemporary window sashes. He explains how modern windows, despite their diverse construction styles and materials, can often be repaired cost-effectively rather than fully replaced. The article details his process of carefully removing sashes, investigating damage, fabricating new rails when necessary, and using epoxy and wood patches to restore deteriorated parts.
Contemporary Window Repair
Over the years that I’ve worked as a general contractor in the Minneapolis area, I’ve been asked frequently to repair or replace deteriorated window sashes. The more of these projects I’ve completed, the more I’ve learned, and the more my interest has grown. I’m inspired by the challenge and detail of window work—so much so that I’ve been traveling regularly to Colorado for classes at Alpine Technical Workshops to better learn how to build windows. This deep dive into window joinery and hardware has informed my repair and restoration work. I’ve invested in new shop equipment that allows me to build new windows efficiently and well when repair isn’t possible or wanted. And I have positioned my business to attract more of this type of work.
While there are lots of talented craftspeople who specialize in rehabilitating historic windows, very few seem willing or able to work on contemporary ones. I generally think of windows in four categories: pre-1945, midcentury, contemporary, and high performance. Pre-1945 is self-explanatory; midcentury covers the transitional designs from the 1950s through the 1970s; contemporary covers most windows produced from the 1980s to today; and high performance is a term I use loosely to describe European-style windows such as triple-pane tilt-and-turn units.
Though it’s easy to date windows, it’s not so easy to categorize their construction characteristics, because even within any of these time ranges, many window styles and construction types can be found. Windows from the pre-1945 era are often double-hung and single-pane with divided lites, but not always. Double-pane glazing was invented in the late 1800s. You might also find push-out casement windows from this period. It’s even more difficult to categorize contemporary windows, which can be made from any number of materials with a variety of joinery types, a range of hardware styles, and other distinct features. One common feature that sets contemporary windows apart, however, is that by the 1980s nearly all manufacturers had left wet glazing behind.
Modern windows are not always possible to repair, and I often don’t know what I’m working with until I have the sash on my workbench and start investigating how it was built. But the project featured here is a good example of newer aluminum-clad windows with deteriorated bottom rails that I was able to repair—in one case by removing the rotted rail and replacing it with a new one that I milled in my shop, and in the other by using a wood patch. I also did some epoxy repair on one sash. It was a few days of work before finishing, which I outsourced, and I still saved the homeowners thousands of dollars compared to the price they were quoted for new sashes.
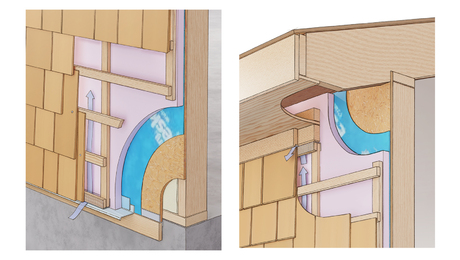
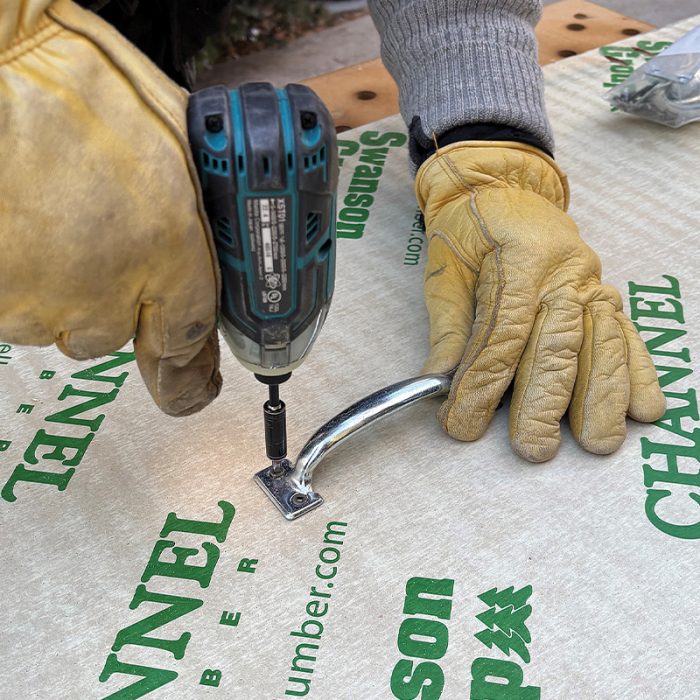
Remove the Sash and Seal the Openings: The Work Starts On-SiteThere’s no way around removing the sash from the window frame to do the repair work. My solution is to seal the opening with a weatherstripped panel and to minimize collateral damage during removal and reinstallation. I do enough of this work that I’ve invested in a bunch of handles, which I screw to the center of each panel to make it easy to install by myself. These arch-top windows were a bit unusual, so instead of taking measurements for the panel sizes, I used the sashes as templates and traced them on the panels.
|

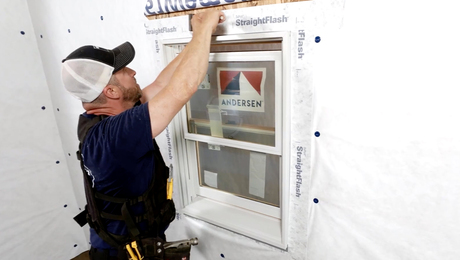
Estimate With the Unknown in Mind
Rehabilitating a window sash is not necessarily inexpensive, but when compared to the cost of a full unit replacement, a sash repair can frequently be the most cost-effective solution. Remember, the cost of a window is only one component of the cost of a full unit replacement. Most of today’s windows are installed with a nailing flange, so replacing a window usually involves removing exterior trim and some of the surrounding siding to take out the existing window and properly install the new one with the water-resistive barrier and flashing. Then you must reinstall siding and trim—and paint, if necessary. There will also be work on the interior. At a minimum, you’ll be removing the window casing and any insulation in the shim space. Like outside, you’ll need to replace the trim, repair any damage from the work, and probably paint.
Replacement windows don’t require all the work described above, but when only one or two windows need replacing, you likely won’t be able to replicate the look of the existing windows with inserts. Sometimes new sashes can be ordered if the manufacturer still sells that unit. That was one option for these homeowners, but the price of the new sashes was a few thousand dollars more than my estimate. So they decided to try repairing the window sashes—not only for the cost savings but also because they didn’t want the sashes to end up in the landfill if it was possible to fix them.
I have enough experience now to get a pretty good idea from a quick visual inspection of its construction and the damage if I can repair a modern window. But I still warn my clients that some windows turn out to be unrepairable because of how they were built. I’ve also encountered escalating costs due to the complexity of the window construction or because the work required to repair the rot was more extensive than I initially thought.
Contemporary window sashes are produced in a broad spectrum of styles. Some sashes feature slot-tenon joinery; others use butt joints. Some sashes can be disassembled with the removal of a few screws, while others are built in a manner that precludes disassembly. On sashes with exterior cladding, some cladding is removable, while other sashes have fully integrated cladding that can’t be removed. All of this means the repair method will depend on the degree of deterioration, the sash’s construction, and the budget. In some cases, sashes are so thoroughly deteriorated that it is not feasible to repair them. As you’ll see in the photos, these aluminum-clad windows were very easy to disassemble and reassemble. You just need to be very gentle with your tools if you want to reuse window parts like aluminum cladding.
For all of the reasons described here, providing a fixed cost for sash repair can be quite challenging. My solution is to offer a fixed price for the tasks I can reasonably anticipate, including sash removal, painting or finishing, and reinstallation. For the unknown repair work, I bill on a time-and-materials basis, providing the client with an estimated range based on similar projects.
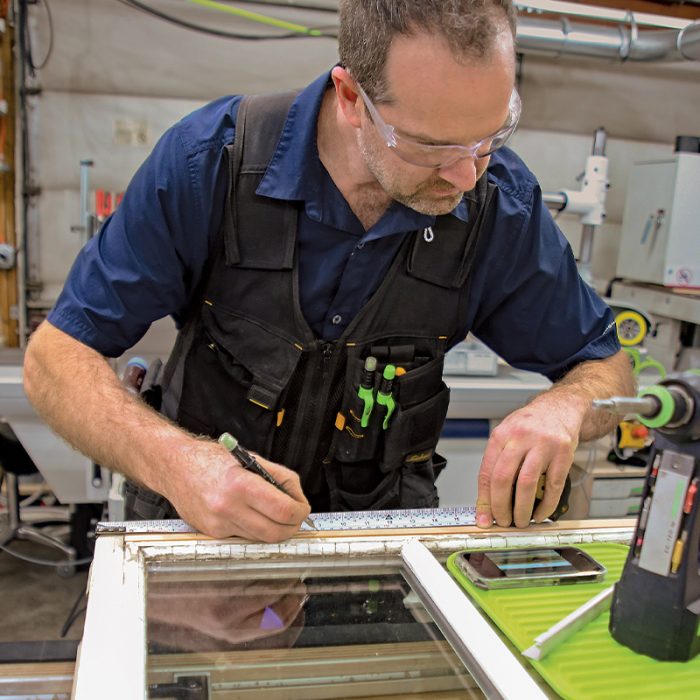
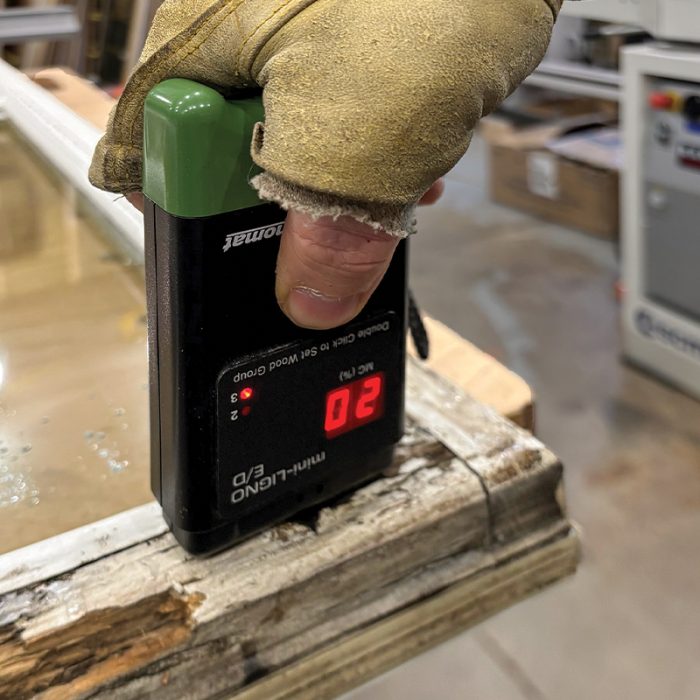
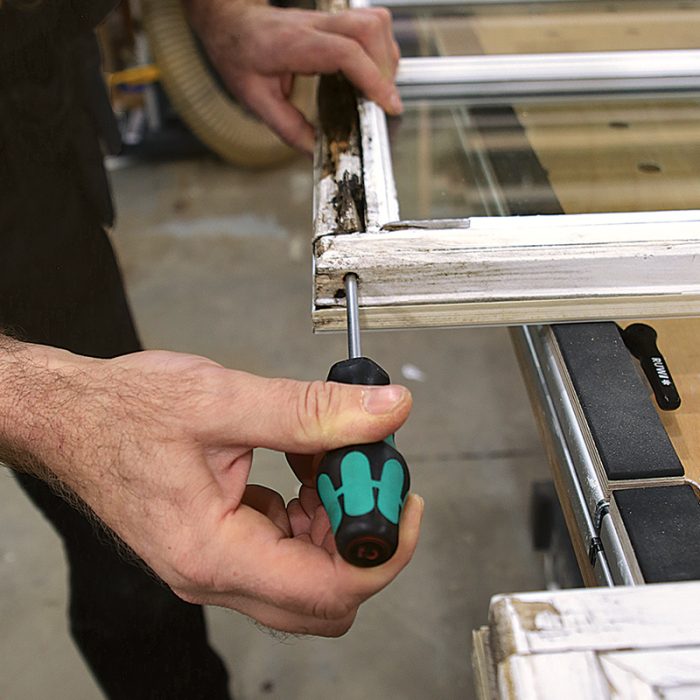
Assess the Damage Back in the Shop: An Investigation Is NecessaryAs soon as I get a sash back to my shop, I start investigating the extent of the damage and the construction details of the window. I record the fastener locations for the hardware, which may not be obvious after the repairs are complete. I check the moisture content of the wood—it needs to be in the teens before I begin any work. I probe the rot with a pocketknife to see how deep it penetrates the wood. And I try to determine how the window was built to see if it can be disassembled enough for repairs. On these window sashes, the stiles and rails were simply screwed together, and the aluminum cladding was just stapled to the wood with a dab of adhesive here and there.
|
Seal Up the Opening Well
The sash-removal process on this project was typical of many of my sash repairs. During my initial visit to the client’s house, I measured the height and width of the existing sashes. This allowed me to rough-cut plywood panels to cover the window openings when I removed the sashes, saving me the trouble of handling full-size sheets of plywood on-site.
I reuse plywood panels from one project to the next, so I don’t mind spending a little extra on better-quality panels. Prior to this project, I had been purchasing primed MDO plywood, which has a plywood core bonded with exterior-grade glue and a thin veneer of primed MDF on both faces. The smooth, white veneer makes for a pleasing surface on which to make marks, and the white face helps to reflect light back into a room—useful when a space will be without natural sunlight for a few weeks while the sash is being repaired. For this particular project, the sashes were taller than my existing inventory of panels, and MDO plywood was out of stock at my local lumberyard, so I purchased HDO plywood, which worked just fine.
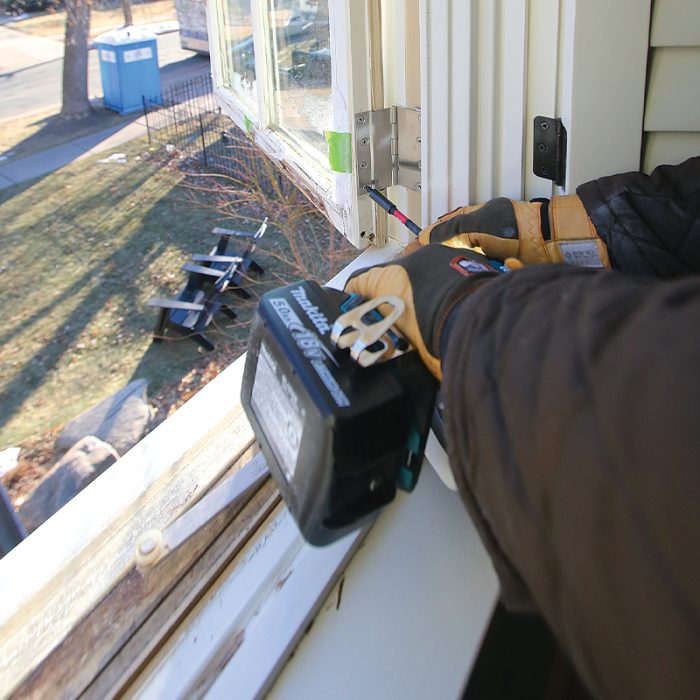
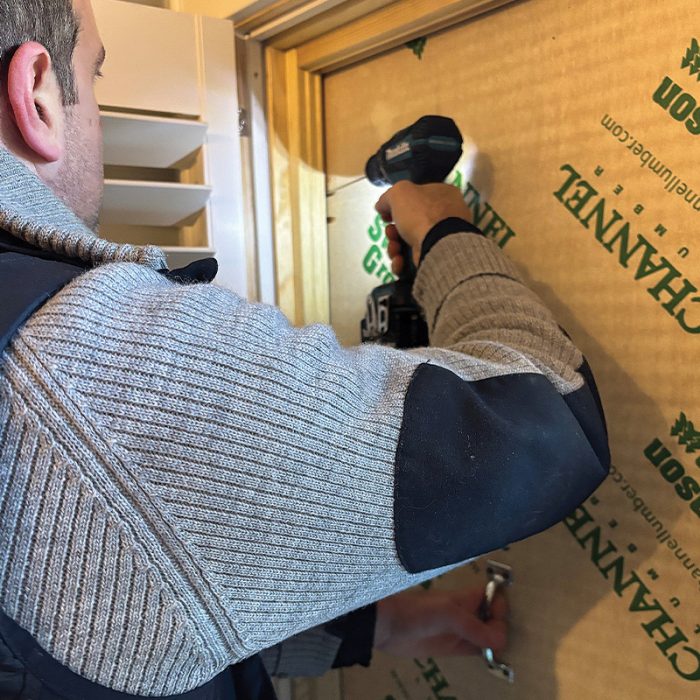
Most of the time, I can remove and install a sash on my own, but that depends on the type and size of the window and the window hardware. These casement windows were big and had leaf-style hinges, so I needed some help. With my feet firmly and securely positioned on a nonslip surface, I leaned out of the window opening to hold the sash while my colleague removed the screws from the hinges. Once all the screws were removed, I carefully maneuvered the sash through the frame and into the space.
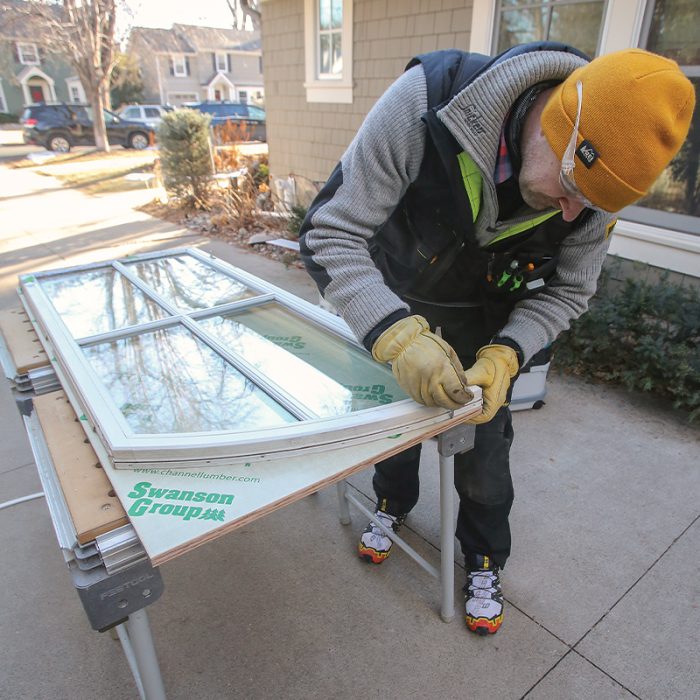
The next step was to transfer the window dimensions to the plywood panels. For a rectangular sash, it would normally be enough to simply measure the existing sash, but since these sashes had a curved top, I opted to place the sash on the plywood and trace the outline. After cutting the panel, I applied a 1/8-in. radius to all the edges. This may seem unnecessary, but the phenolic facing on the plywood is very sharp, and I didn’t want to risk denting, scratching, or otherwise damaging any of the existing surfaces.
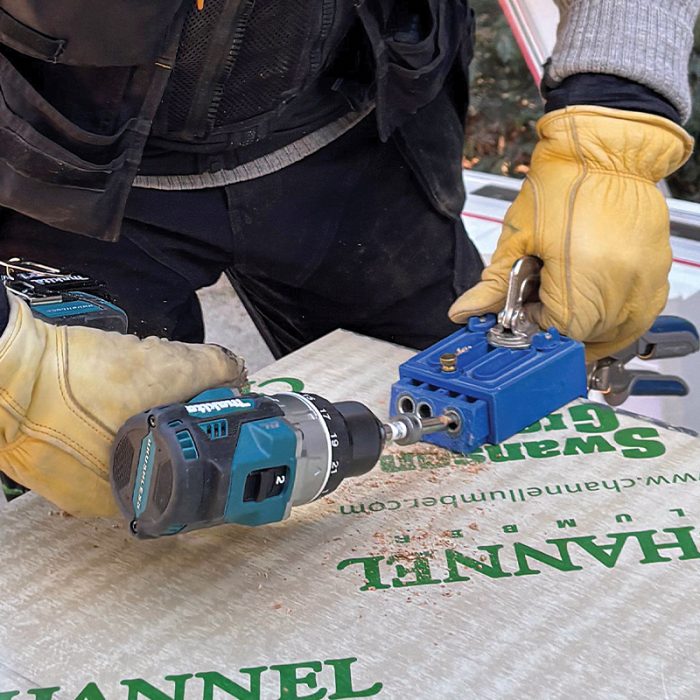
After easing the edges, I drilled holes for pocket screws in the panels—two in each corner—and used a slot cutter to mill a groove around the perimeter of the panel for weatherstripping. This not only created a better temporary seal for the homeowners, who were having this work done during the winter in Minnesota, but it also served as an additional layer of protection between the panel and the surrounding finished surfaces. Finally, I added a handle in the middle of each plywood plug, which allowed me to perform the installation from inside the home.
Once I positioned the panel in the opening, I drilled pilot holes and locked it in place with pocket screws. My goal isn’t to drive the screws tight; I just need them to engage with the window frame so the plug is securely pinned at all four corners. Later, when I reinstalled the repaired sashes, I filled the holes in the frame with a suitable exterior-grade white sealant.
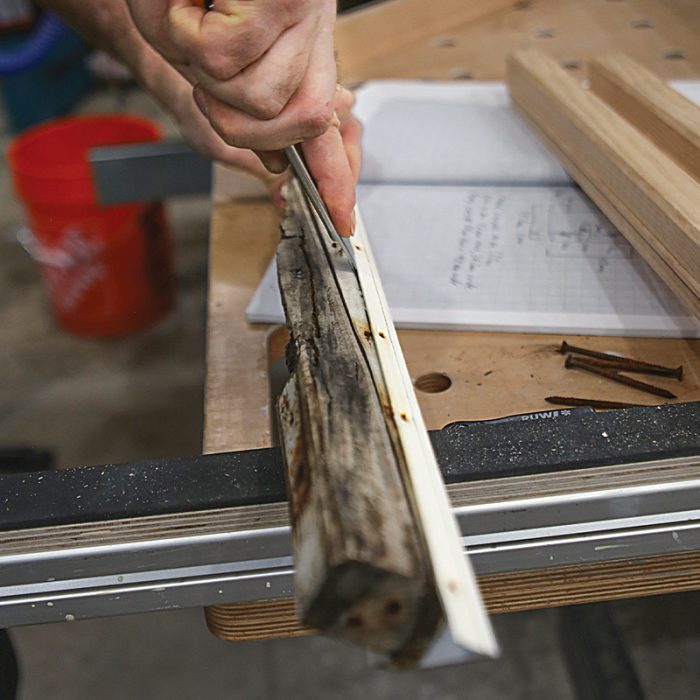
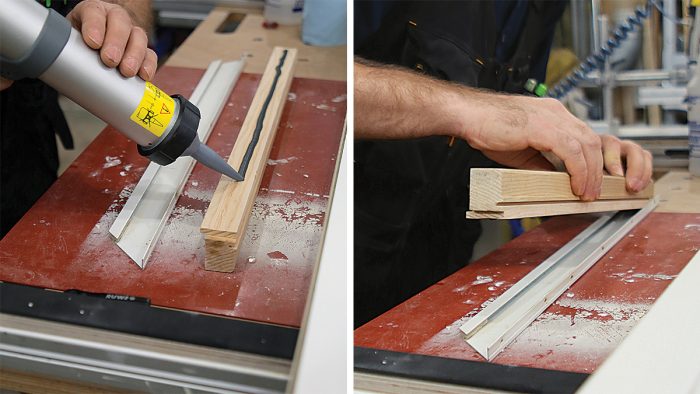
3 Repair Options: 1 • New Parts Are PossibleSometimes the extent of the damage makes repairs impossible unless I can disassemble the window. If I can take it apart, I can make new parts for it. On one of these windows, the bottom rail was too damaged to repair with epoxy or a patch. Because it was simple to remove, I decided to mill a new rail. I started by drawing the rail profile with dimensions and a numbered milling sequence. I then milled the part with a series of knives on my shaper. (This could also be done on a router table.) After test-fitting the new rail, I added the aluminum cladding to the new rail with adhesive and reattached the rail to the window using the same joinery techniques the manufacturer used originally.
|
Make New Parts if You Need to
In my shop, I placed the sashes on my worktable. I used a set of aluminum support rails covered with a protective, nonskid rubber material that I slipped under the sashes to prevent damage and unwanted movement as I worked on them. The rails are produced by RUWI in Germany and are available in the U.S. from a handful of distributors. There are many ways to protect sashes while working on them, and it’s worth the effort to be very careful. Even on the easiest jobs, reassembly may be tricky—and collateral damage can make it impossible.
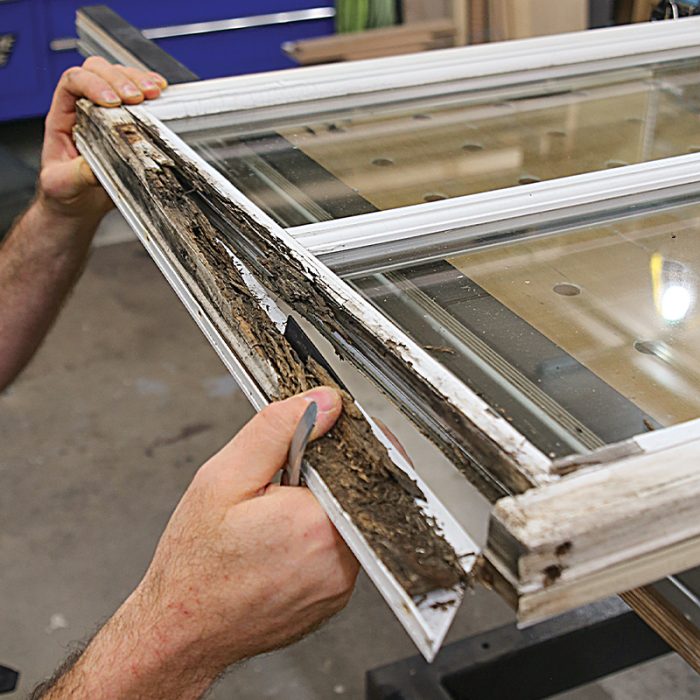
With a bit of investigation, it was clear that the two sashes I had to repair for this project had very different degrees of damage and needed different types of repair. On the first sash, the bottom rail had disintegrated to the point where the only thing keeping the aluminum cladding in place was the sealant between the cladding and the glass. The bottom glazing bead, which holds the glass in place, was in rough shape but appeared salvageable. The work on this sash boiled down to two tasks: fabricating a new bottom rail and repairing the glazing bead.
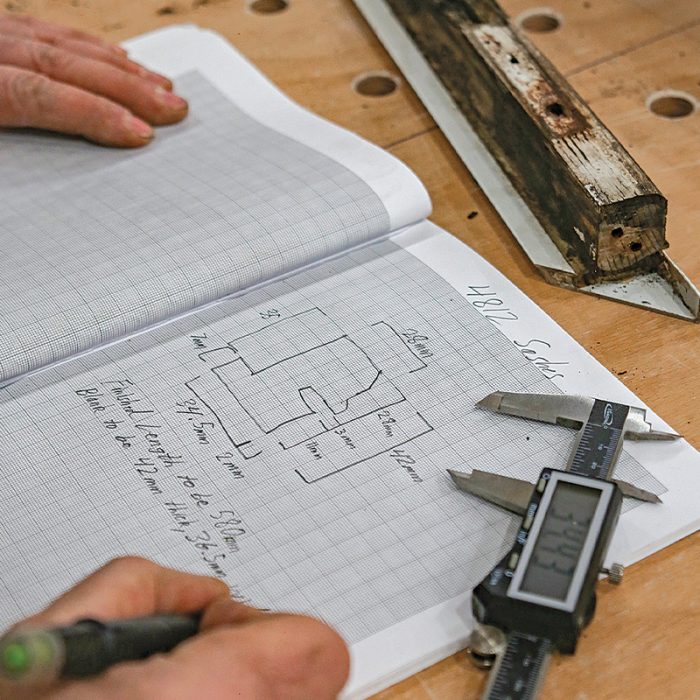
Fabricating the replacement rail was a reasonably straightforward process. I was fortunate that the very end of the rail had retained enough of its shape that I was able to draw a representation of it, then take careful measurements and record them on the drawing. I do a lot of this work, so I’ve invested in an industrial shaper with a power feeder, but all of this could be done on a router table with straight, slotting, and 45° chamfer router bits—along with the necessary featherboards, push blocks, and other jigs or accessories needed to prevent injury and ensure a precise, consistent milled pattern. The key is always to work through the order of bits and passes that makes the most sense for profiling the piece. I like to write the order on my drawing and refer to it often.
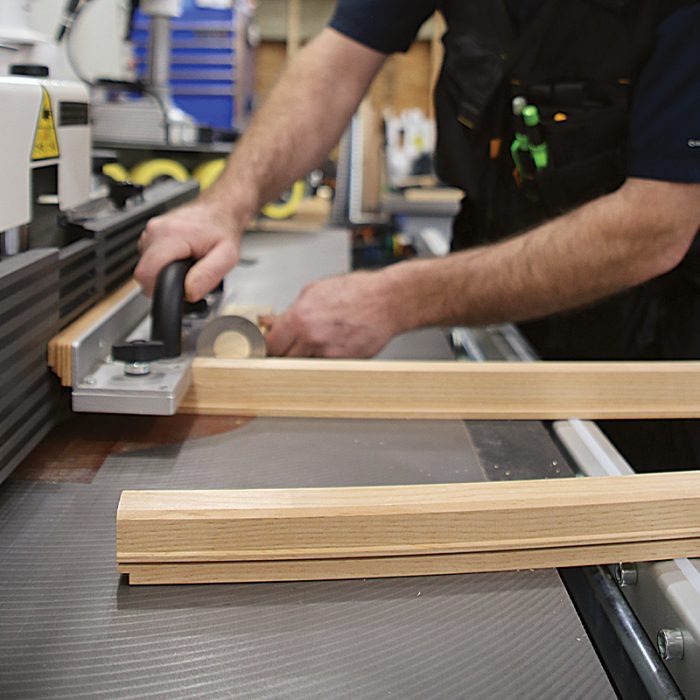
Because fabricating a rail requires several separate milling operations—each with its own opportunity for error—I prepared three pieces. Setting up the bits for each pass is the most time-consuming part of the process. Once the bit is set up to make the cut, profiling three short pieces of stock only takes a few minutes. I always start with a test cut on the first piece. On this rail, I made two milling mistakes, both of which I caught on the first piece and corrected on the remaining two. I later installed one, mimicking the original construction details of the window—but first, I set them aside while I repaired the glazing bead on this sash.
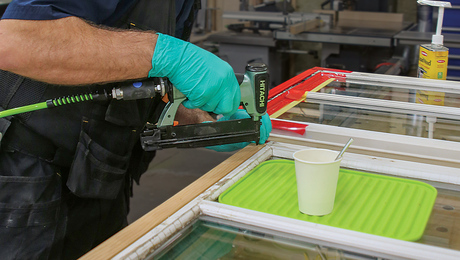
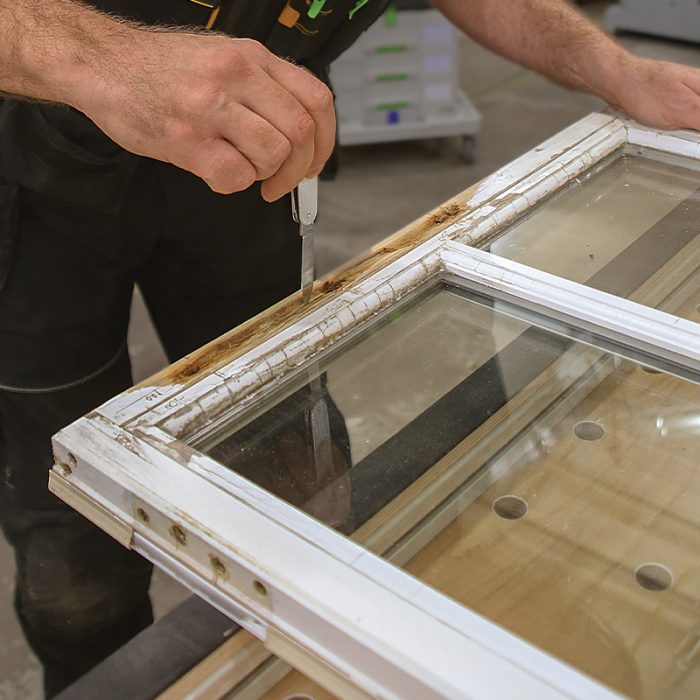
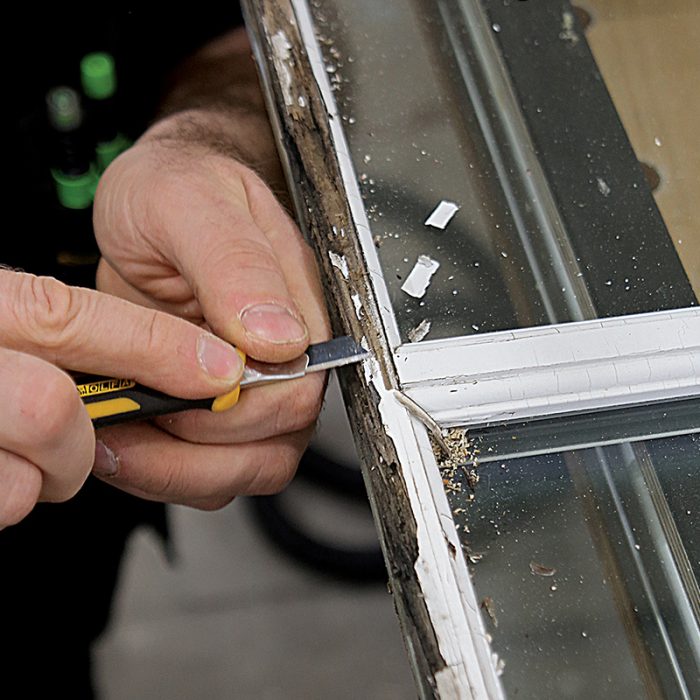
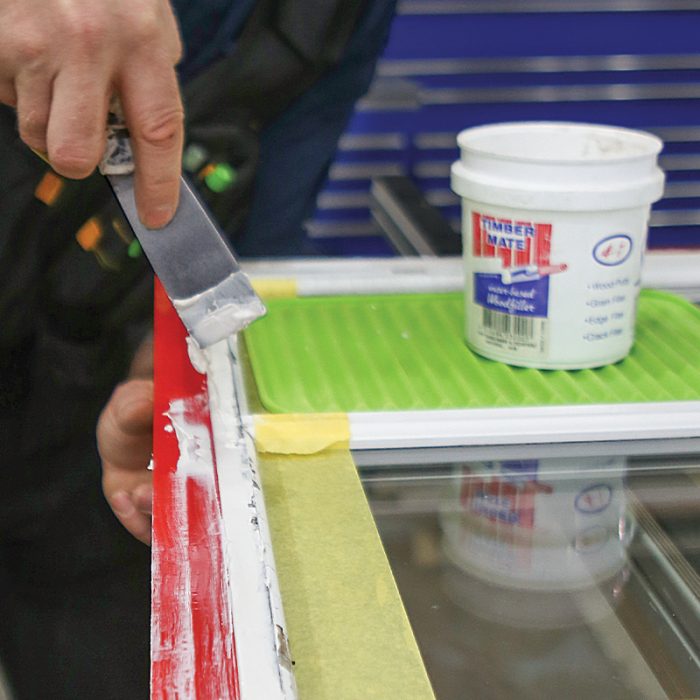
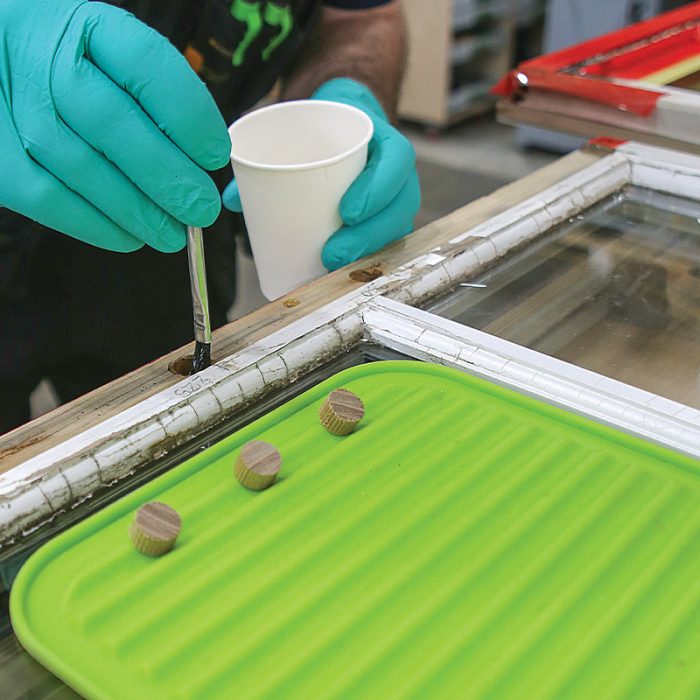
3 Repair Options: 2 • Rebuild With EpoxyA repair option that falls somewhere between milling completely new parts and filling a void with wood patches is rebuilding parts with epoxy putty. On one of these windows, I used that technique on the glazing bead, which I couldn’t remove. Because of the severe rot, this was delicate work, so I started by carefully removing the paint with a utility knife. After removing all the rot, I stabilized the remaining wood with an epoxy wood consolidant and began rebuilding the bead with epoxy putty. I installed a temporary bottom rail, covered in tape, to use as a screed. I then shaped the epoxy with sandpaper and created a smooth finished surface with water-based wood filler.
|
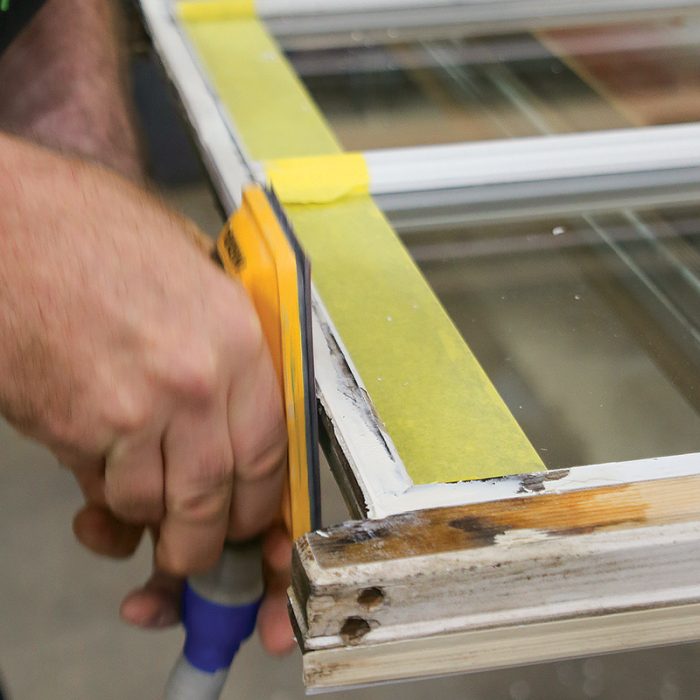
Use Epoxy for Repairs
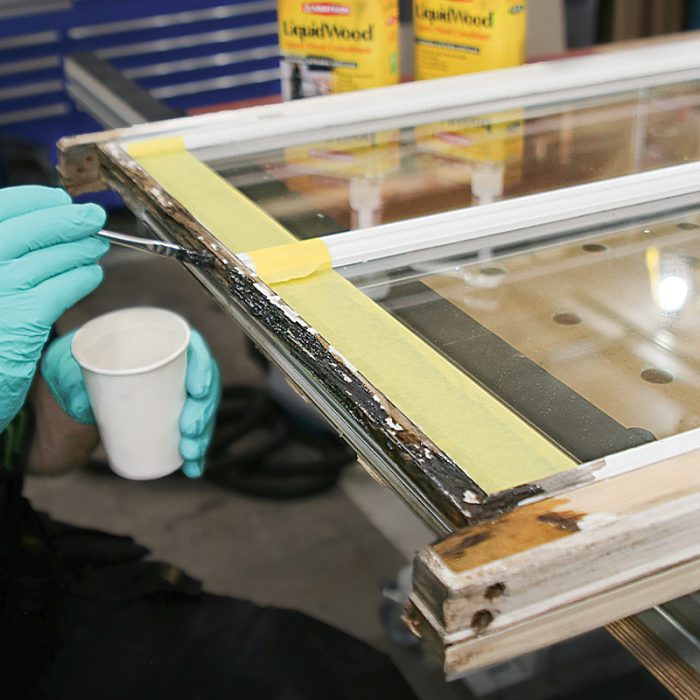
I didn’t want to disassemble the window any more than I had to, and there was still some good wood left in this glazing bead, so I settled on an epoxy repair. While there are many good brands of epoxy available, I appreciate that Abatron offers a system of products that are compatible and that bond well with each other. So I use Abatron products for a lot of window repairs, including on this job.
The first step was to apply epoxy consolidant—Abatron’s LiquidWood. In order for the consolidant to soak into the wood, I had to remove all of the paint. Due to the deterioration of the glazing bead, using a sander or scraper was not feasible, so I very carefully used a snap-blade knife to lift the paint from the wood. Then I masked the sash with 3M tape, which I know isn’t affected by epoxy, and mixed equal parts of the LiquidWood into a paper cup—the pump dispensers make it easy to meter volumes. I mixed the consolidant for roughly two minutes, following the manufacturer’s instructions, and let it stand for 10 minutes to allow the chemical reaction to start. Then I applied the consolidant to what remained of the glazing bead with a disposable brush. By the time I had worked my way from one end of the bead to the other, the consolidant had thoroughly soaked into the wood where I had started, changing from a glossy, wet appearance to a dry, charcoal-like surface. I repeated the application at least five times, until all surfaces maintained their glossy appearance for several minutes. I left the epoxy to cure overnight.
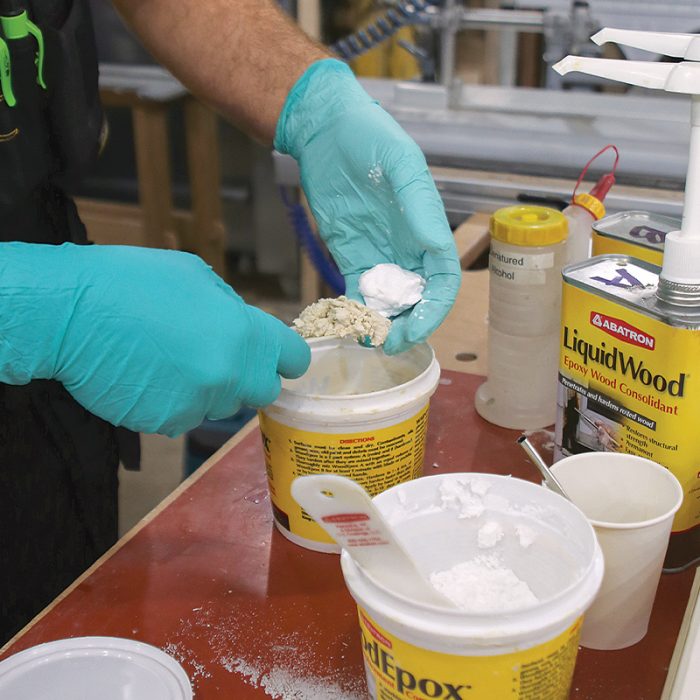
The next morning, I started rebuilding the glazing bead with Abatron’s WoodEpox, a two-part putty. Abatron recommends applying WoodEpox while the LiquidWood consolidant is still somewhat tacky. If the consolidant has cured, you can add a bit more to improve the bond—which I did first. I then mixed equal parts of the WoodEpox, being careful to use a different tool to scoop putty from each container so I wouldn’t cross-contaminate the products. I kneaded the material with gloved hands for a few minutes until it was thoroughly mixed, then set the ball aside for a few minutes to allow the chemical reaction to begin.
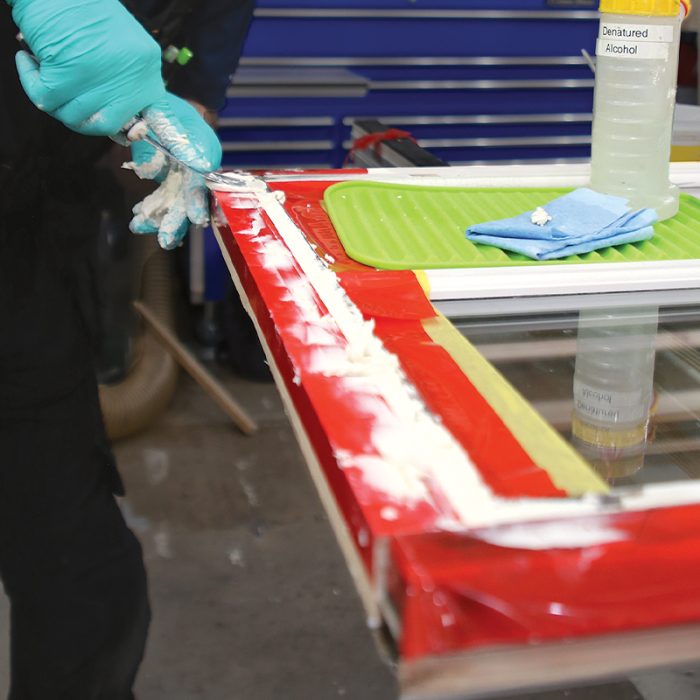
After a few minutes, I began pressing the putty into the deeper voids and recesses where I had removed rotted wood from the glazing bead. Once the deepest areas were filled, I thinned the putty with the LiquidWood consolidant until it reached a peanut butter–like consistency. Using a temporary bottom rail as a screed, I applied the thinned putty to the face of the glazing bead with a putty knife. The surface of the putty did “tear” here and there, but the primary goal was to restore the volume and strength of the glazing bead—any aesthetic blemishes could be resolved later with a waterborne wood filler. With the putty in place, I again left the products to cure overnight.
The next morning, I began sanding. The work required finesse, so I used a hand-sanding block rather than a power sander. After removing the excess epoxy, I applied a skim coat of Timbermate water-based wood filler to the glazing bead. Timbermate can be diluted easily to a suitable consistency, dries quickly, and sands to a smooth surface. At 16% relative humidity, my shop was particularly dry while I was working on these sashes, so the Timbermate was ready for sanding within the hour.
Another nice thing about epoxy is that it can be profiled like wood. The last step on the glazing bead was to route a small relief to match the detail of the original profile.
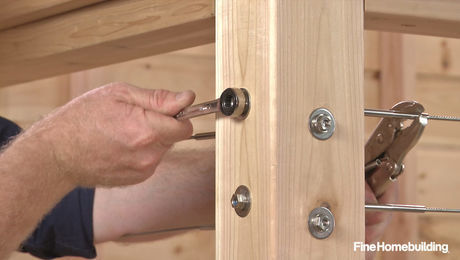
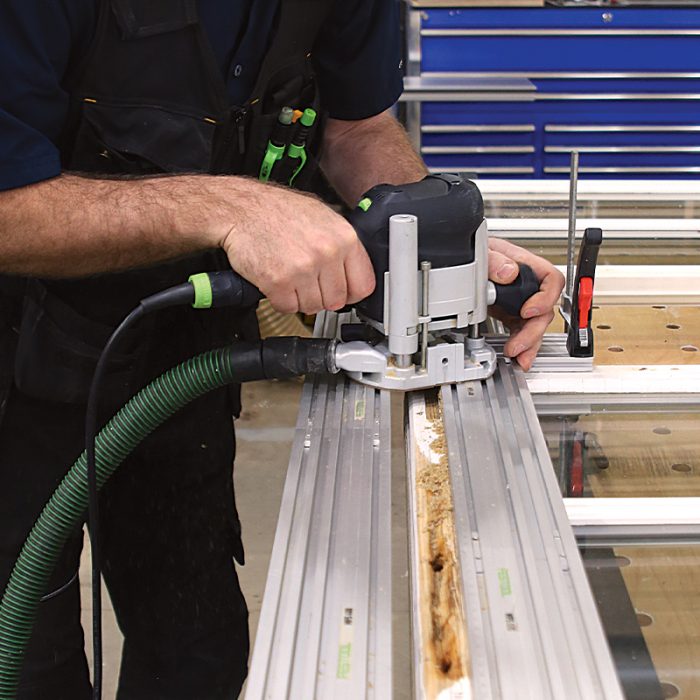
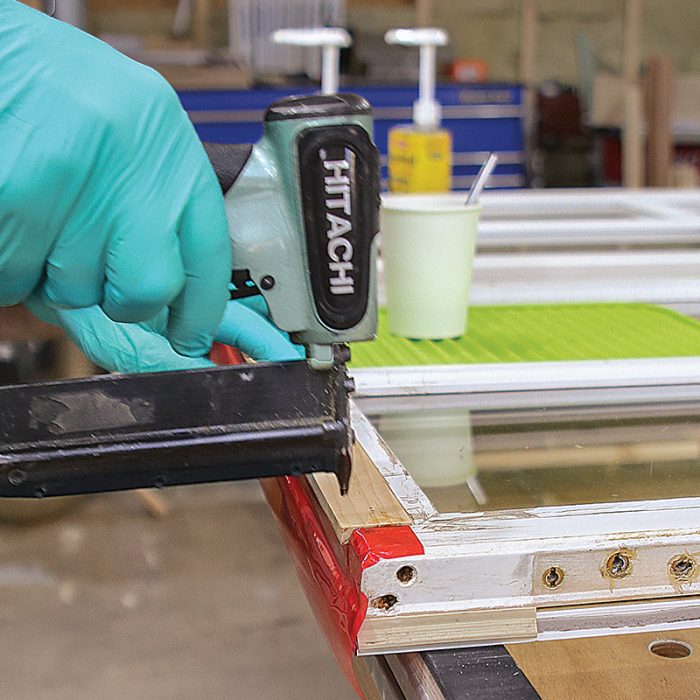
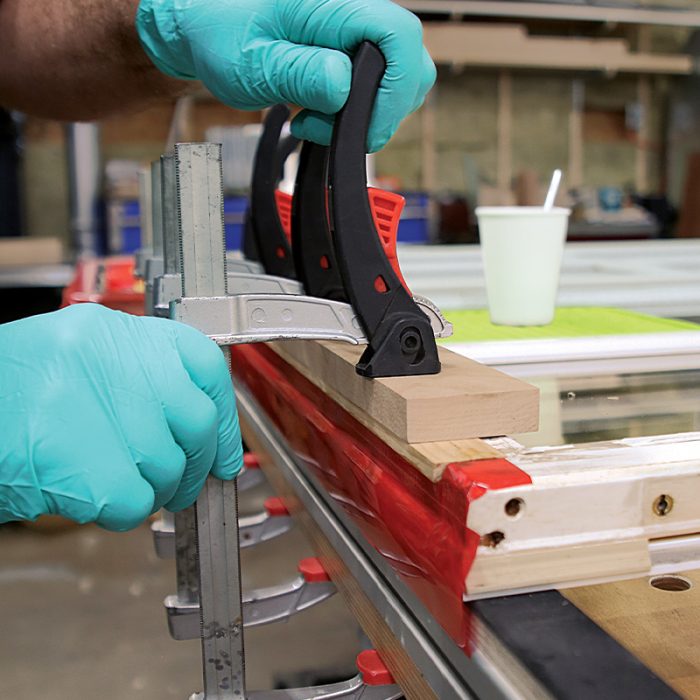
3 Repair Options: 3 • Use Wood PatchesWhen the rot is minimal, a wood patch is often the quickest path to a durable repair. If I can use a router and a template to remove the rot from the sash, it’s easy to fill the void with a new piece of wood, preferably the same species that the window was made from (in this case, clear pine). On this rail, severe rot was limited to the areas around the hardware fastener holes. So before patching the length of the rail, I bored out the holes and filled them with epoxy and dowels. Then I applied epoxy to both the rail and the patch, and pinned and clamped the patch in place. Once the epoxy had cured, I trimmed the patch flush with the bottom rail and replicated the original chamfer detail.
|
Try a Dutchman Patch if Possible
It may sound like I worked on one sash at a time, but that wasn’t the case. No single aspect of the work described above took very long, but there was a lot of waiting for epoxy and sealant to set, so I was simultaneously working on the second sash, which was in much better condition. Its bottom rail also had rot, but generally only around the three hardware-fastener holes, where moisture had penetrated the wood.
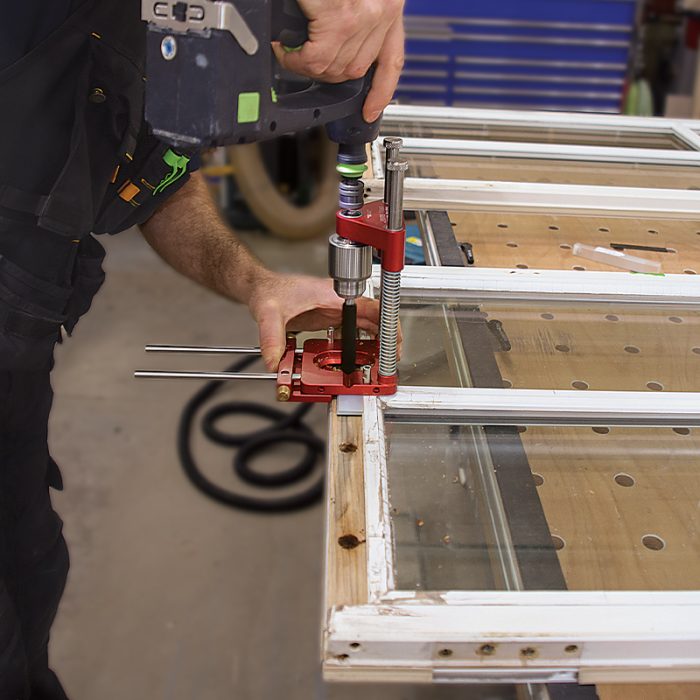
The repair work for this sash started like many of my window-repair projects do. I set up a routing template to remove a bit of wood from the face of the bottom rail, taking care to stop the router bit before I reached the stiles. After my first pass, I was relieved to see that the underlying wood was in good condition. The deterioration around the hardware screw holes was more severe but appeared to decrease with depth. Before patching the face of the rail, I decided to counterbore the three hardware mounting holes with a 16mm drill bit, producing holes 10mm deep, and used 16mm wood dowels to fill the holes.
Before installing the dowels or the patch, I mixed some more wood consolidant and applied it to the bottom rail of this window, following the same process I used on the other window’s glazing bead. I also applied a thin layer of paste wax to the bottom edge of the glazing bead on this window to prevent the patch from bonding to the bead during glue-up. When this work was done, I could epoxy in the dowels.
Once the dowels were in, I used a Dutchman patch milled from clear pine to infill the recess I had created in the rail. I made the patch about 0.5mm proud of the stiles and 1mm taller than the rail. This allowed me to precisely sand the face of the rail flush with the stiles later and to precisely trim and profile the bottom of the patch after assembly.
When installing the patch, I applied epoxy to both the existing rail and the underside of the new piece of wood. I positioned the patch and fastened it with three 23-ga. nails. Because epoxy is slippery, the pins help prevent the patch from creeping out of position during clamping. Given the patch’s relatively thin profile, I used a scrap piece of wood as a caul to distribute clamping pressure evenly across the face of the board.
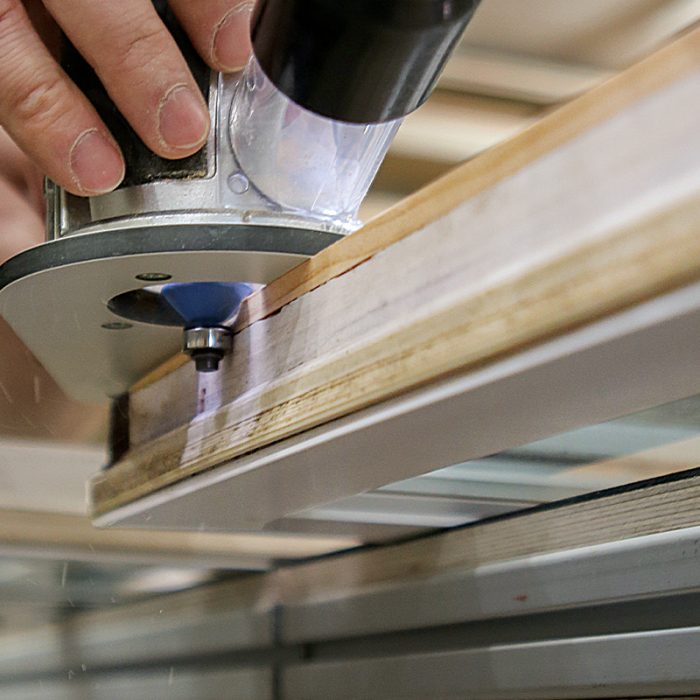
The next morning, I removed the clamps and completed the repair. I sanded the patch flush with the stiles and used a flush-trimming cutter in a small router to remove the excess material overhanging the bottom of the existing rail. Then I recreated the original profile of the bottom rail with a bearing-guided chamfer bit.
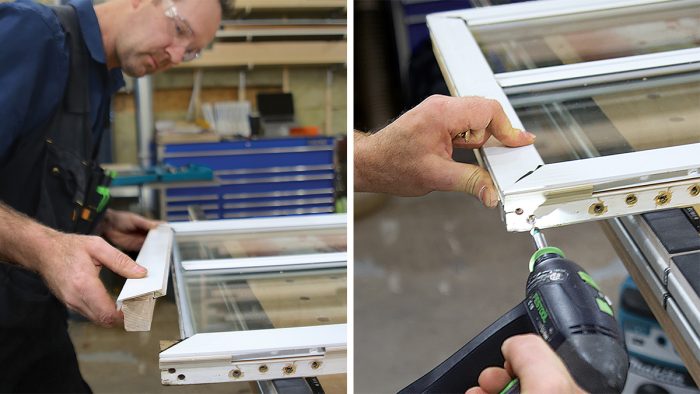
With the milling work wrapped up, all that was left was to refer to the photographs I had taken of the hardware locations, mark them on the repaired rails, and drill for screws. I like to do this before painting so I can mark directly on the piece without worrying about disturbing a finished surface.
It was only a few days after I brought these window sashes to my shop that they were ready to be sent out for painting. A week or so later, they were ready for me to reinstall.
Why I Prefer the Metric SystemYou may have noticed that I primarily work in millimeters. Like most carpenters, I cut my teeth with imperial measurements, which of course are ubiquitous in framing—plywood sheets are 4 ft. by 8 ft., OSB lands on studs at 16 in. or 24 in. on-center, and so on. These coarse measurements work well with the building materials designed for that system, and I still revert to imperial measurements for certain tasks. However, as I learned more refined carpentry techniques and began acquiring shop machinery, I quickly transitioned to the metric system. One reason I like metric units of measurement is that 1mm is smaller than 1/16 in., allowing me to be more precise. Yes, 1/32 in. is finer than 1mm, but few measuring devices are marked in 1/32-in. increments, and the handful of rulers that do have such fine gradations are challenging for my middle-aged eyes to read. Millimeter-scale measuring devices are widely available, and I can easily discern if a sharp line falls exactly on a full millimeter increment or between millimeters. Also, most higher-end woodworking machinery is metric-native. Internal components, machine threading, and detents use millimeter increments. For instance, the depth rods on my Makita and Festool plunge routers will adjust in 1mm increments with every full rotation of the adjustment knob. Likewise, the spindle- and blade-height adjustments on my shaper and sliding table move in 2mm increments per full turn of a hand wheel. Setting the height of a cutter or sawblade can be done quickly by simply counting revolutions on the hand wheel—no need to measure. Moreover, most of my shaper tooling is produced in metric dimensions, so it’s far easier to work in this system than to convert. Most higher-end cabinetry hardware is designed around a 32mm system, using millimeter measurements for hole diameters and depths. Once I converted to the metric system, I was surprised to discover how many everyday objects are made in millimeter increments. And I haven’t even mentioned how much simpler the math is when everything is measured in increments of 10. |
— Tom Gensmer is a long-time remodeler in Minneapolis who specializes in repairing, reproducing, and building windows and doors. Photos by Brian Pontolilo.
RELATED STORIES