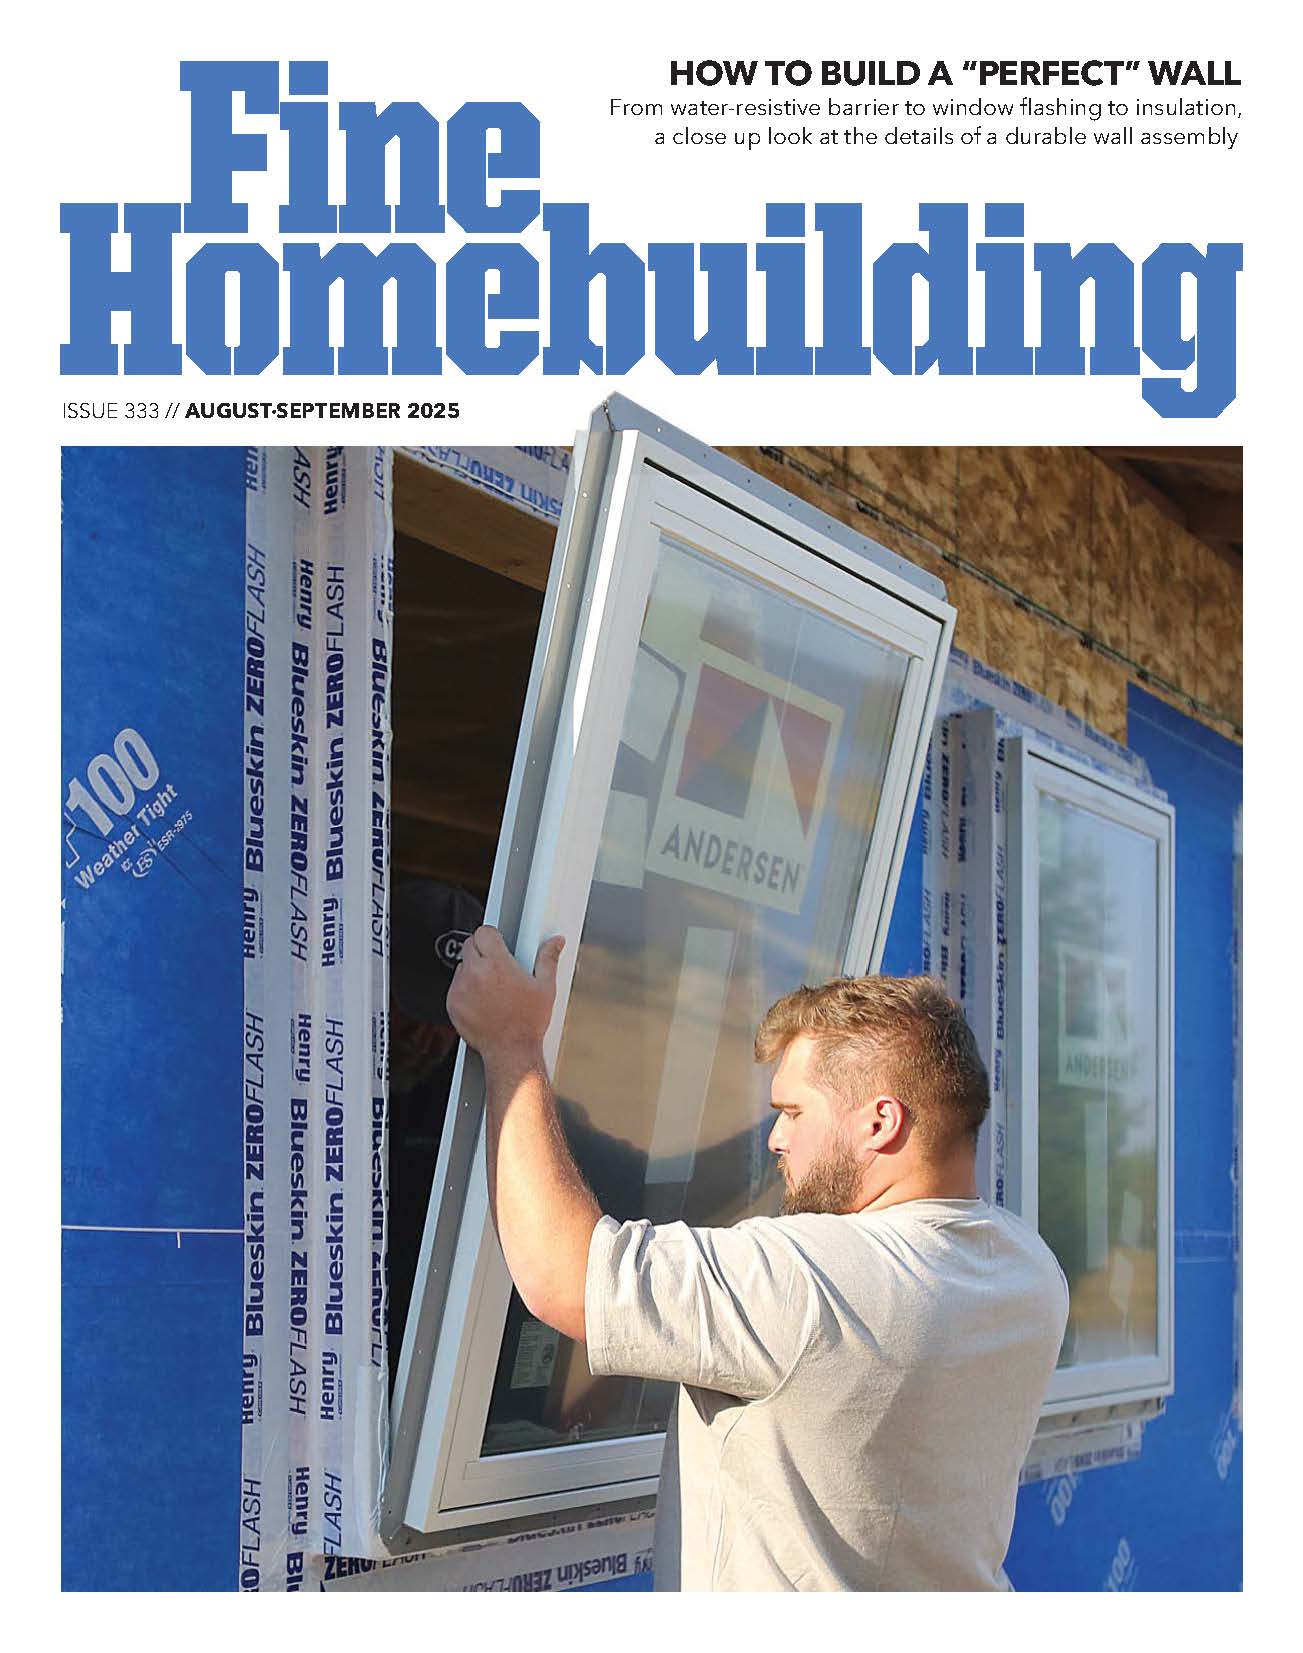
A Practical Perfect Wall
Getting the details right for a wall assembly with the control layers to the exterior and lots of drying potential.
Dr. Joe Lstiburek’s “Perfect Wall” concept places the four critical control layers—water, air, vapor, and thermal—outside the structure for maximum efficiency and durability. While building a true perfect wall can be complex and costly, modified assemblies that split insulation between exterior continuous insulation and cavity insulation offer a practical, affordable approach.
The project featured uses vapor-permeable materials, a self-adhered water-resistive barrier, and careful air barrier detailing to achieve high performance on a modest budget in a cold climate. Attention to proper flashing, penetration sealing, and rainscreen installation ensures durability and drying potential. This approach demonstrates that a high-performance wall is achievable with standard materials and thoughtful execution.
Make a “Perfect Wall” Work for You
Joe Lstiburek’s “Perfect Wall” is now a well-known building science concept in which all four control layers—water, air, vapor, and thermal—are placed to the outside of the structure. It’s a highly efficient and durable way to build a wall (or a roof), and it works pretty much everywhere. But while the concept of a Perfect Wall is simple, executing some of the details required for a true Perfect Wall assembly can become quite complex (and expensive), especially in cold climates where a very thick layer of exterior insulation is needed.
Thankfully, the Perfect Wall concept can be applied to modified assemblies that provide easier constructability and affordability while maintaining high levels of efficiency and durability. The most practical approach is to split the thermal layer between continuous exterior insulation and cavity insulation (keeping some of the thermal control inside the building), ensuring there is a sufficient ratio of insulation outboard of the sheathing to provide condensation control by keeping the sheathing warm.
Lots of designers and builders are now taking this approach, and it has even made its way into the building codes. The project shown in this article demonstrates just how practical—and even affordable—it can be. Contrary to some opinions floating around in the industry, building to a higher performance standard doesn’t have to be expensive or complex. It doesn’t require seven-figure budgets, or exotic materials, or windows sourced from suppliers in different parts of the world. Rather, building a high-performance home relies on only two things: an understanding of the control layers, and the diligence to execute the details that make those layers work.
For the assembly on this project, I carefully selected and integrated the control layers with the aim of building a home that exceeded the requirements in the 2021 IRC while maintaining a modest budget, constructable details, and familiar materials. The result is a durable, high-performing assembly that is practical to build and (with minimal modifications) works in pretty much all climates—a practical Perfect Wall.
It’s All About the Control Layers
This project is in northern Minnesota (climate zone 7). The design heating temperature is –20°F. (It’s OK if you don’t know what a design heating temperature is; the point is, it gets cold here.) The building has a simple 30-ft. by 36-ft. shape and is built on a frost-protected shallow foundation that has R-10 underslab insulation and R-12.5 slab-edge insulation. The roof is a 4:12 pitch built with 18-in. raised-heel trusses.
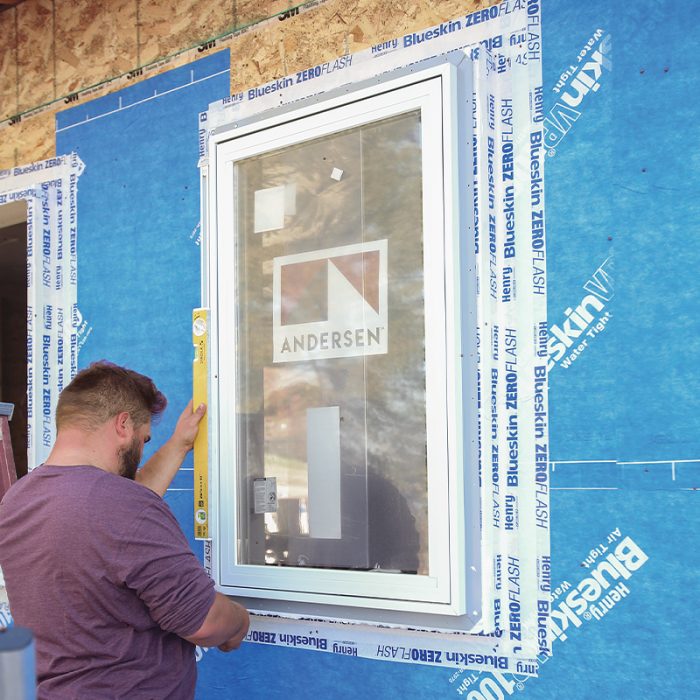
The attic is vented, and the house has a flat ceiling inside. The goal was to build a structure to the prescriptive 2021 IRC with R-10 continuous insulation over R-13 cavity insulation, and with above-code airtightness of 1 ACH50 or better. We used off-the-shelf Andersen 100 Series casement windows and builder-grade insulated steel exterior doors. There are no dormers, no foundation bump-outs, and, generally, no frills. But even a bare-bones build requires close attention to the control layers.
The water control layer is the most important. If a house’s moisture-sensitive building components become wet every time it rains and can’t dry before the next wetting event, the rest of the control layers won’t matter. The water control is always located on the exterior of the home. A common mistake is to rely on cladding for bulk water control. Siding eventually leaks, so I consider the water control layer to be the water-resistive barrier (WRB) and all the important flashing details around windows, doors, and other penetrations.
We have many options for WRBs today, which are typically separated into four categories: mechanically attached (for example, DuPont’s Tyvek or Magnera’s Typar), integrated panels (Huber’s Zip System sheathing; LP’s WeatherLogic), self-adhered (Henry’s Blueskin; Benjamin Obdyke’s HydroGap SA), and fluid-applied (Prosoco’s Cat 5).
Air control is the next most important control layer. Air control can be on the exterior or the interior of the wall, and some builders choose both. Membranes such as Pro Clima’s Intello and Siga’s Majrex are sometimes used along the inside face of the studs to accomplish both air and vapor control.
However, sticking with the Perfect Wall ideal, I prefer to locate the air control layer outside of the structure, and integrated with the water control layer. Most WRBs are air-impermeable, but I don’t recommend using a mechanically attached product as an air barrier. They are too difficult to detail for this purpose. Most high-performance homes I see being built today use an integrated or self-adhered WRB, especially when the WRB is also serving as the air control layer.
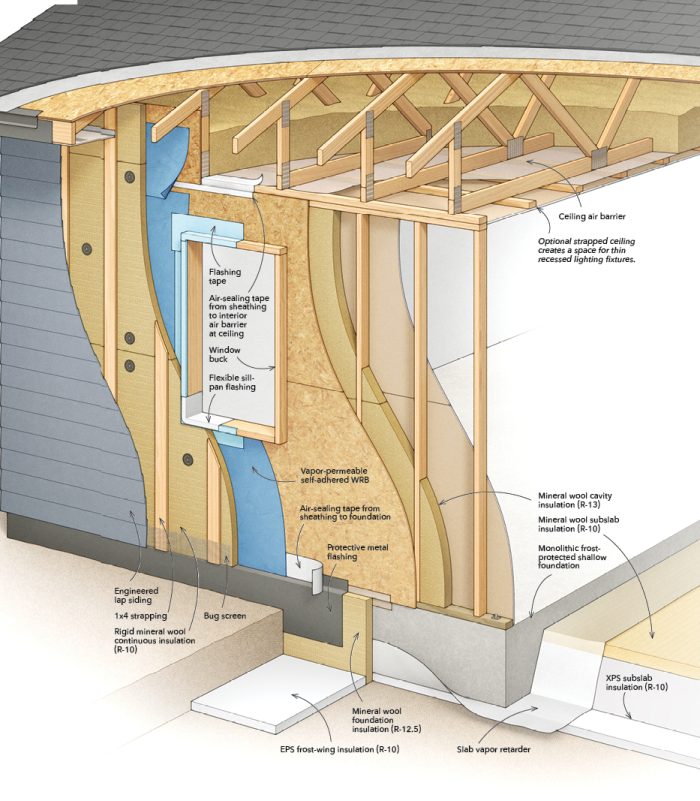
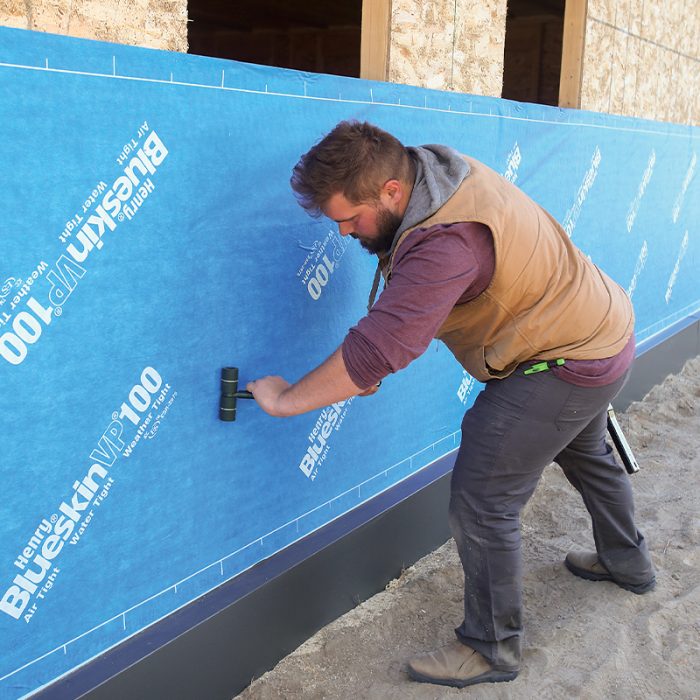
On this project, I used a self-adhered membrane, Henry Blueskin VP100, as my WRB and air control layer on the walls. Installed outside the sheathing and behind the exterior insulation, it’s protected from the homeowners and the elements. And choosing a vapor-permeable product means I don’t restrict the assembly’s drying potential. Remember, the air barrier must be continuous; the drawing on p. 31 show how I connected the air barrier on the walls to the foundation and ceiling.
Vapor and thermal control are the two remaining control layers. Depending on who you talk to, there may be some discussion on their order of importance, especially in different climate zones. In practice, as long as you consider the requirements and location of each in your design, and account for how they affect each other, order doesn’t particularly matter.
For instance, in a cold climate, if you locate the thermal control layer—or at least enough of the thermal layer—on the exterior, it will keep the sheathing warm in the winter and minimize condensation risk. This largely eliminates the need for high levels of interior vapor control, which is a benefit of the Perfect Wall. Conversely, with a well-detailed vapor control layer at the interior face of the studs in a cold climate, the importance of positioning of the thermal control layer to prevent the sheathing from becoming a condensing surface is reduced.
When designing the thermal layer for walls, the prescriptive codes allow for many insulation options. In my area, the 2021 IRC offers four different possibilities. I could choose to use a cavity-only strategy, but I must achieve R-30 in the cavity. That would require me to use closed-cell spray foam in a 2×6 wall or build the walls with 2x8s or 2x10s if using fibrous insulation; neither was a practical solution for this project.
I could choose one of two hybrid continuous insulation (CI) options, such as R-5 CI over R-20 cavity insulation, or R-10 CI over R-13 cavity insulation. Or I could forgo the cavity insulation entirely and move to R-20 CI installed on the exterior, leaving the open wall framing as a service cavity. This option would yield an actual Perfect Wall assembly, but it’s not the most practical.
For this project, I went with R-10 CI over a 2×4 wall with R-13 in the cavities. This option allows for the proper ratio of continuous exterior insulation to cavity insulation for my climate so that the interior vapor retarder can move from a class I or class II to a class III vapor retarder, which painted drywall provides. In addition to creating a more durable wall, eliminating the interior vapor retarder allowed for some product and labor cost savings that helped offset the more expensive WRB and the CI. It’s important to note that the prescriptive codes for insulation levels and for vapor retarders are interconnected but are found in two different parts of the IRC. Consult both for your projects to reduce the risk of making a mistake.
For the CI, I selected 2½-in. Rockwool ComfortBoard 80, a vapor-open, rigid mineral-wool insulation that will allow any moisture that should contact the WRB to readily dry outward. This product is easy to install, though it can be a bit finicky when you’re trying to create a flat plane for cladding (more on this later). All CI options complicate window and door installation along with the other mechanical, electrical, or plumbing penetrations. Any competent builder can handle these challenges, though they do require some planning and sequencing adjustments.
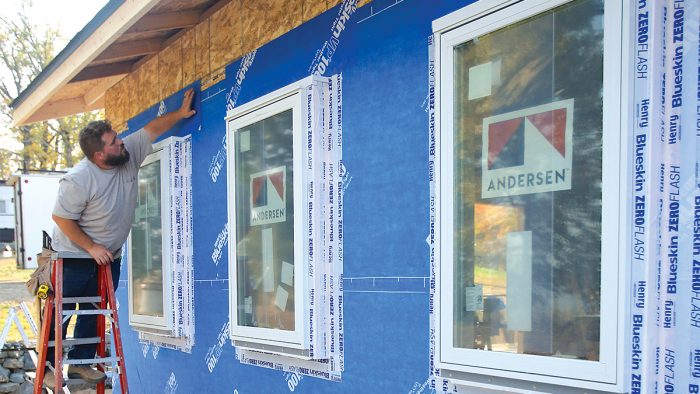
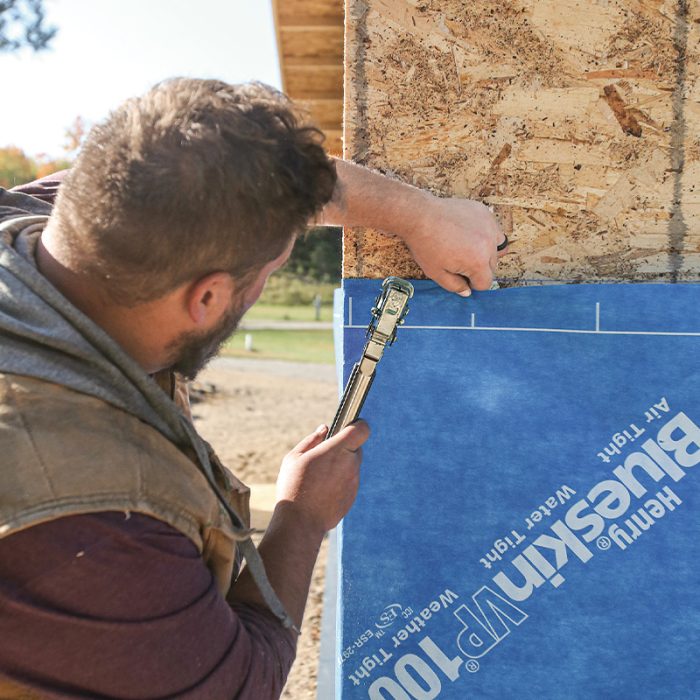
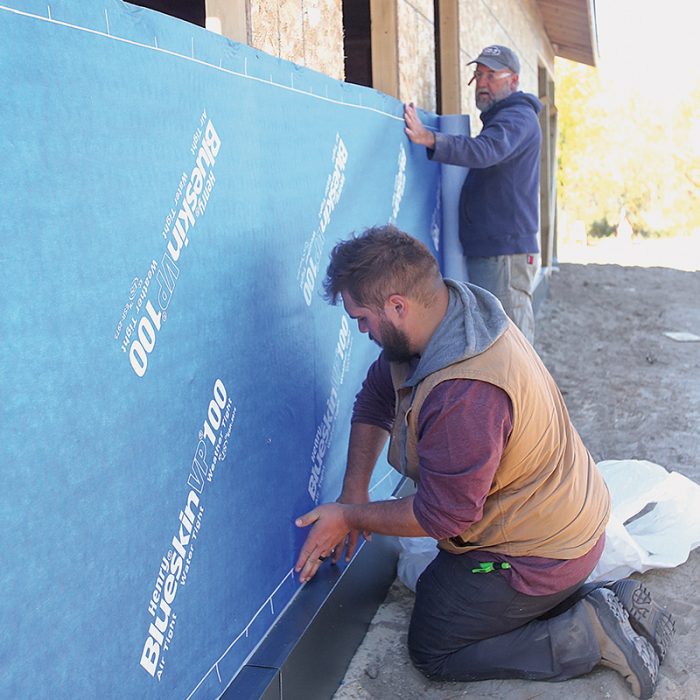
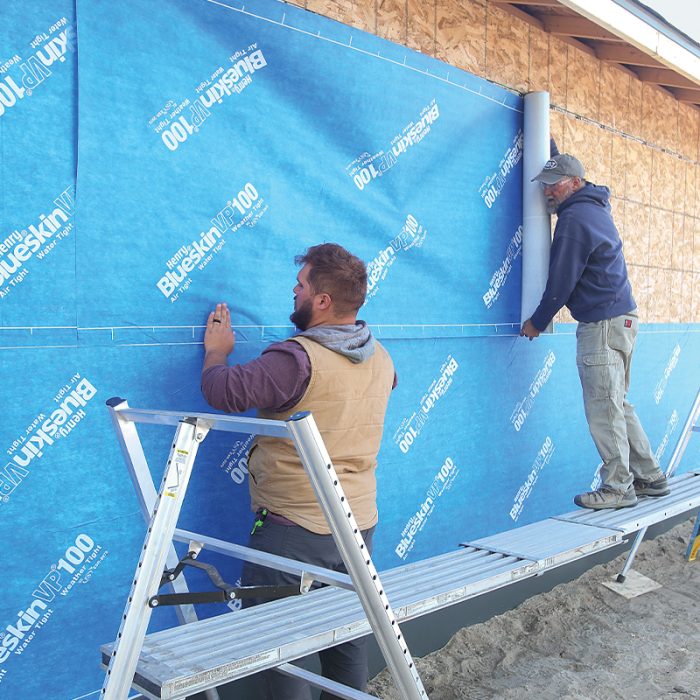
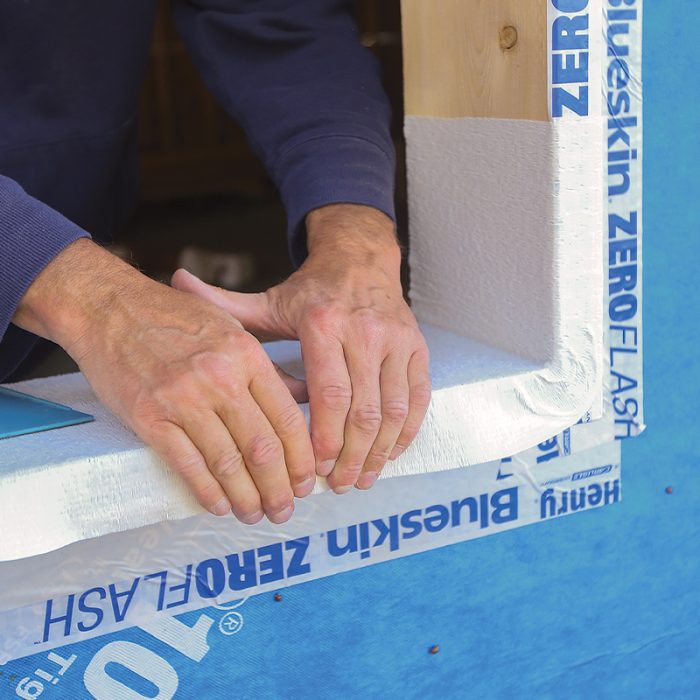
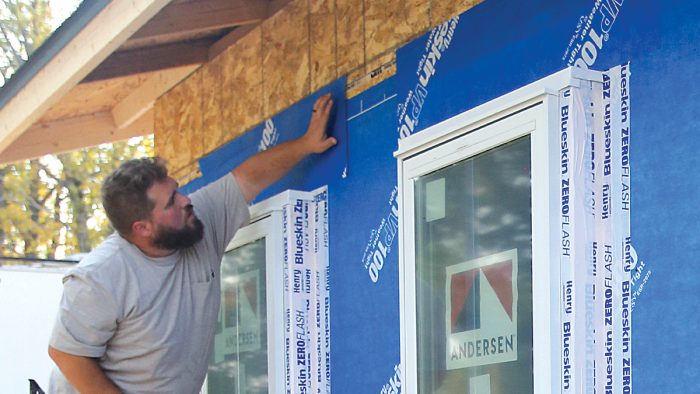
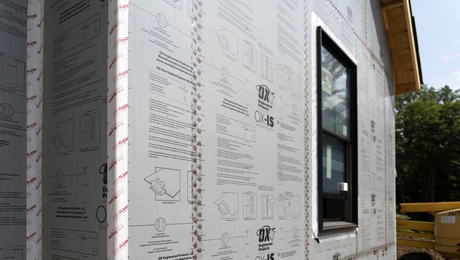
Slick Peel-And-StickTwo sets of hands, a deliberate process, and a little patience make installing a peel-and-stick water-resistive barrier (WRB) easy. Before starting the WRB installation, it’s a good idea to inspect the sheathing for anything that could penetrate the membrane.
|
Adjusting for Different Climates
As I mentioned earlier, one of the most interesting aspects of Lstiburek’s Perfect Wall is that it works in pretty much every climate. This practical Perfect Wall assembly can also work in any climate. In either case, you’ll likely adjust the R-value of the insulation and maybe the permeability of the WRB, depending on the climate zone and a few other building details.
In a cold climate like mine, the potential for condensation is in the colder months, when warmer (more humid) interior air pushes toward the colder (less humid) outside air. If the sheathing is at or below the dew point, vapor can condense and wet the sheathing. This assembly keeps the sheathing warm and eliminates the condensing surface and risk of condensation. To create a lot of drying potential should the wall get wet, all the materials I chose have higher permeability rates. But this concern is sometimes different in other climates.
In hot, humid climates, for example, the vapor concern happens in the warmest months, when the hotter (more humid) outside air pushes into the assembly toward the colder (less humid), conditioned interior air. In this scenario, rather than the sheathing, it may be a surface near the interior of the wall, such as the drywall, that could become a condensing surface. Instead of using insulation to keep the interior surfaces above the dew point, sometimes it’s advantageous to slow inward vapor drive with a lower-permeance material on the exterior. This could be the WRB or the insulation.
Whether it’s a wall, foundation, or roof you are planning, it’s always important to understand your climate zone and to make sure the assembly details and materials make sense for your local conditions.
The Trick With Peel-And-Stick
Everything I’ve discussed so far needs to be considered at the drawing board so that when the time comes to do the work, you can focus on the details. On-site, the work started with the WRB installation, which required a bit of prep work, including inspecting the wall for any errant fasteners that could puncture the membrane.
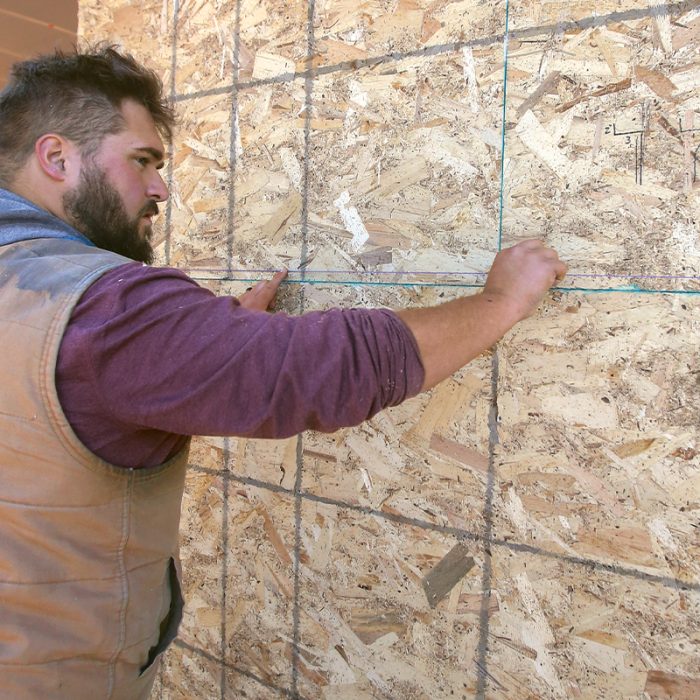
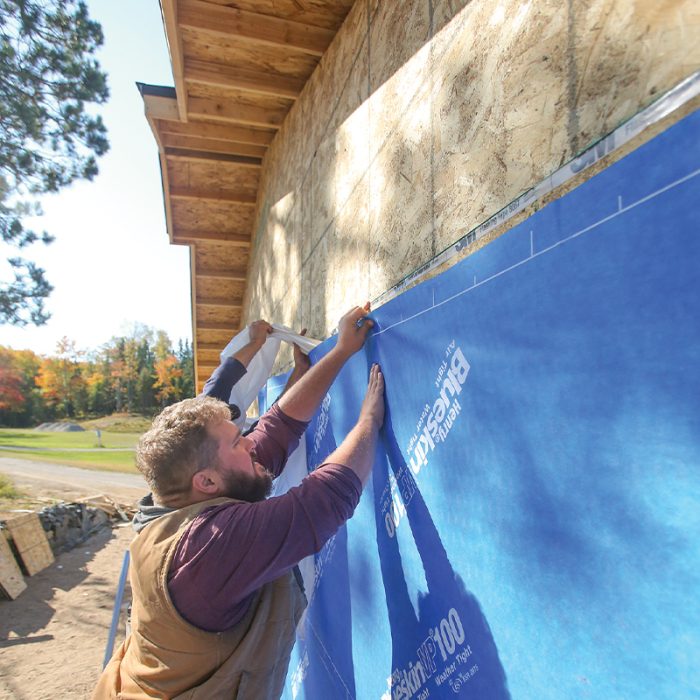
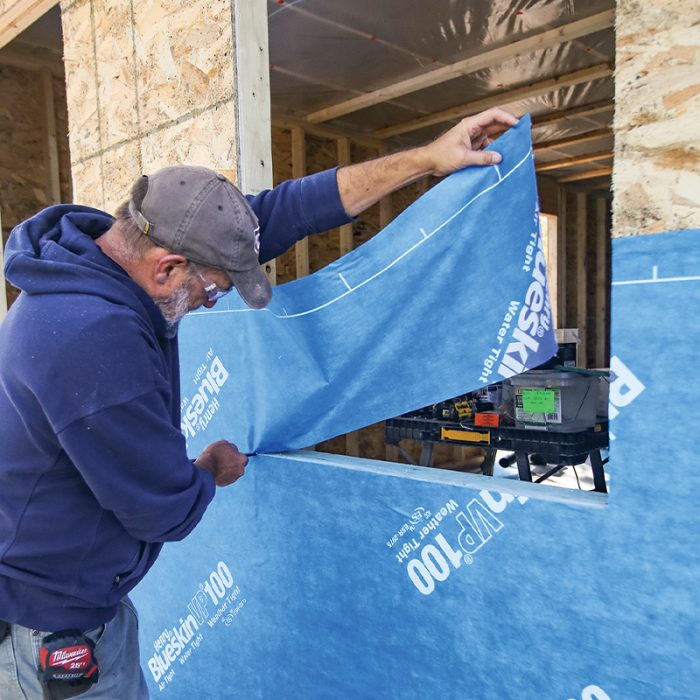
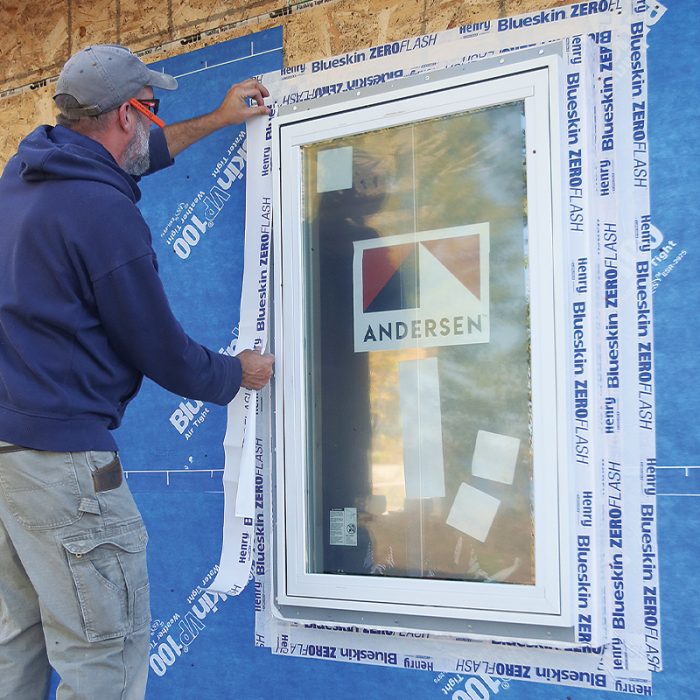
It’s most common to install a peel-and-stick WRB horizontally, with shingle-style laps. It’s possible to do this alone, but two people will accomplish it faster and better. The installation starts by snapping control lines to keep the material level or plumb. It’s often helpful to tack the very top of the membrane to the wall with staples to hold it in place as you peel and position the bottom half of the material; just make sure to put the staple where it will be covered by an overlapping course. Blueskin can also be installed vertically, which makes it an easier one-person job, but understand that the overlap increases from 2 in. to 3 in. when switching from a horizontal to a vertical installation.
I am a fan of staying with a single manufacturer’s system of products whenever possible. On this project, I did use both a 3M and a Siga product for air-sealing before installing the WRB, but I used only Henry products for the WRB assembly so that there were no concerns about their compatibility. As an added benefit, sticking to Henry products increases the factory warranty from 10 years to 15.
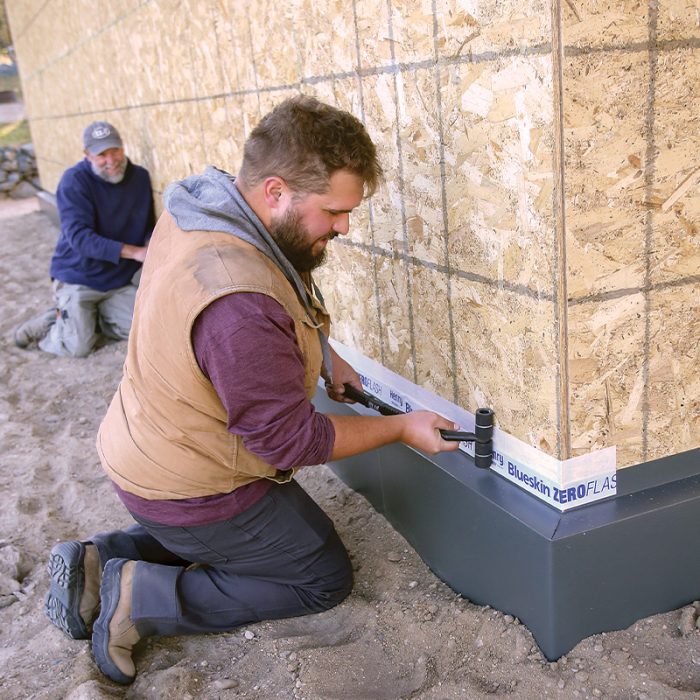
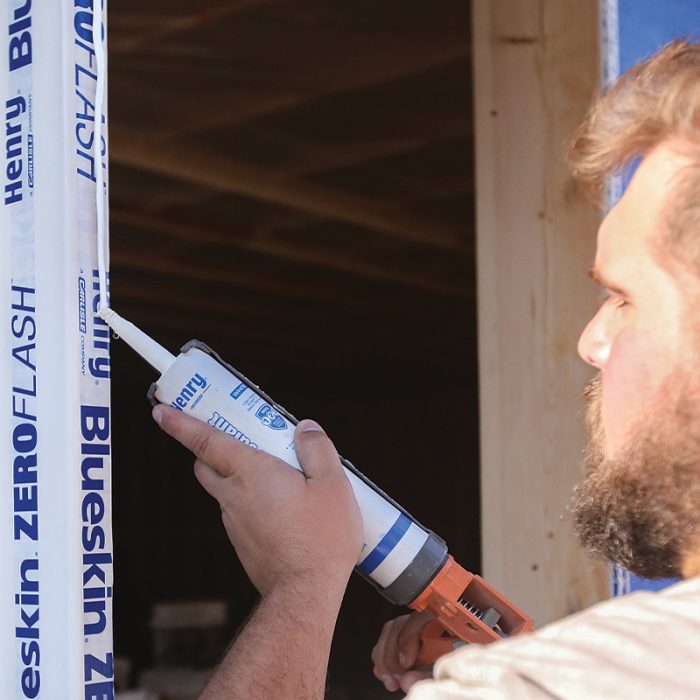
If you are going to use products from a variety of manufacturers, make sure they are compatible. For flashing on this project, I also tried one of Henry’s new tapes, Blueskin ZeroFlash. This synthetic butyl product is formulated to have good bond even in weather down to 0°F.
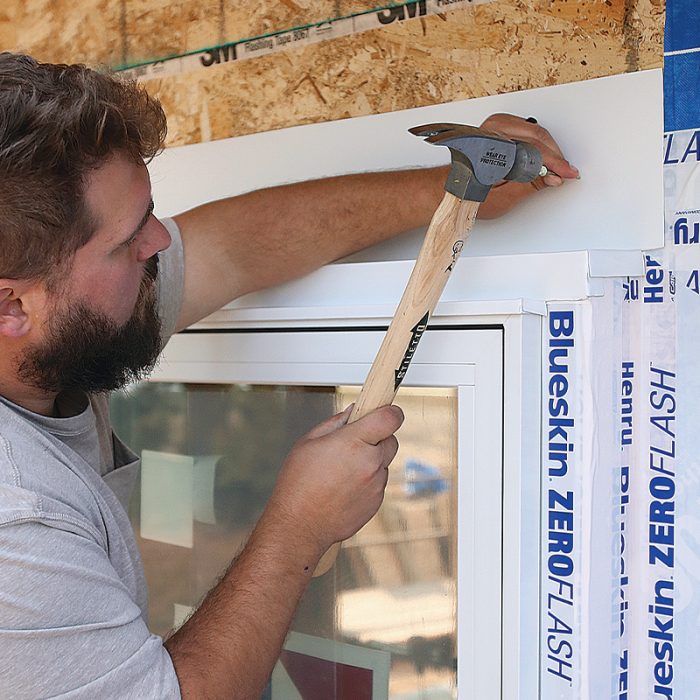
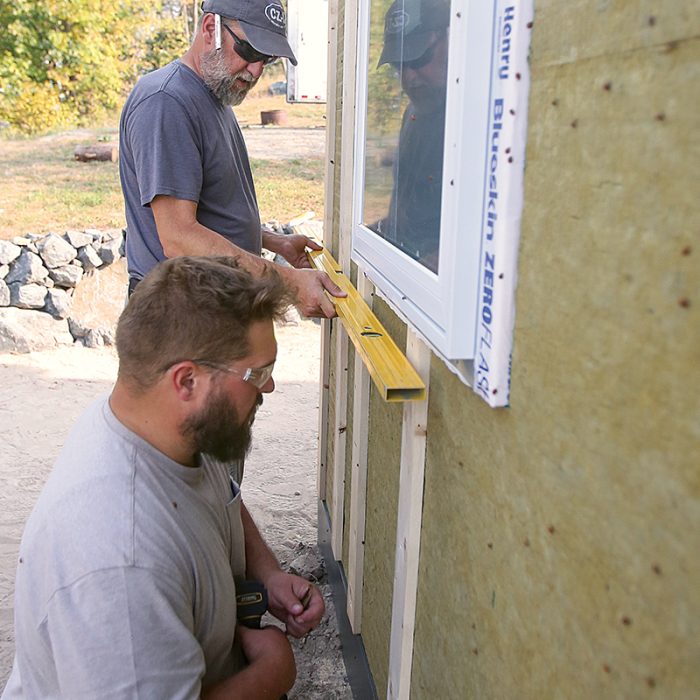
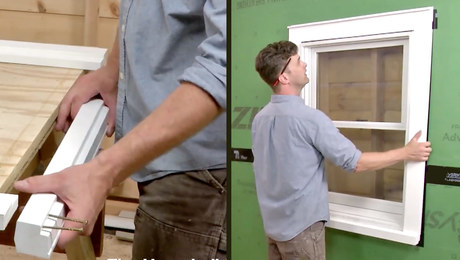
The Buck Starts HereWell-flashed, site-built window bucks provide the base for durable window installations in plane with the siding. Note that the rough openings are oversized to accommodate the window bucks. 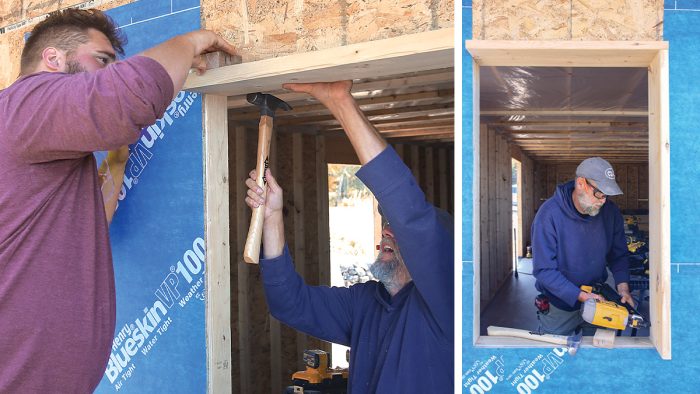 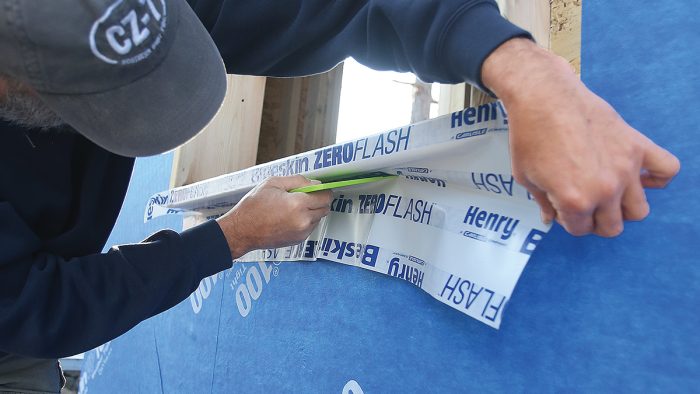
|

Penetrations Are Important
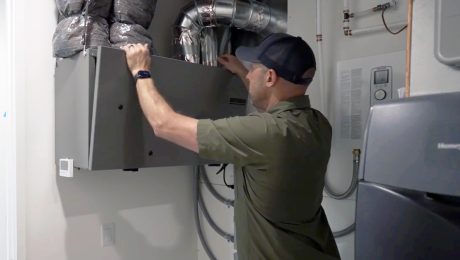
Windows and doors are the largest and usually the most numerous penetrations in the building enclosure. However, we also have smaller penetrations—such as those for outlets, water spigots, heat-pump line sets, and ventilation ducts—that need to be sealed so they don’t leak either water or air. In the past, I used tapes to seal these holes, but I recently moved to gasket systems. Tapes can fail if the cable, pipe, or duct is moved after the tape is placed and the seal is broken. A gasket system allows for this movement while maintaining both the water seal and the air seal.
We used Pro-Flash gaskets on this project. These are simple, square pieces of flexible plastic sheeting with an integrated rubber gasket. There are four sizes designed for round penetrations ranging from 1/8 in. to 7 in. Part of the gasket can be cut away to allow for different-sized cables and ducts.
We had to deviate slightly from the manufacturer’s installation instructions to better suit the self-adhered WRB; rather than integrating the gaskets with the WRB using a shingle lap as recommended by the manufacturer, we taped all four sides of the flashing to the WRB. As this method results in a reverse lap, Henry requires a bead of its 212 All Purpose Crystal Clear Sealant across the top of the top tape joint to back up the leading edge of the tape joint.
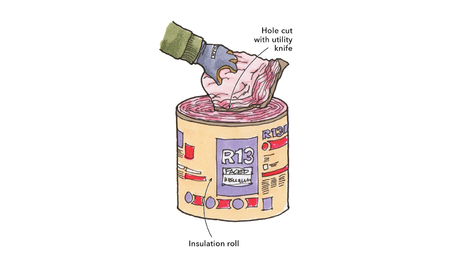
We also had a few recessed electrical boxes that the insulation needed to be cut around. We chose to use Arlington’s Low Profile In Box. The box is shallow enough that we did not need to cut a hole into the wall sheathing, which would have complicated the air barrier; instead, we only needed to poke a cable through.
After the insulation and rainscreen strapping were installed, we fastened the electrical boxes, hose bibs, vent covers, and other accessories that penetrate the enclosure to mounting blocks made from pieces of the LP SmartSide that we used for siding, which created a finished look. The mounting blocks are attached to the rainscreen strapping.
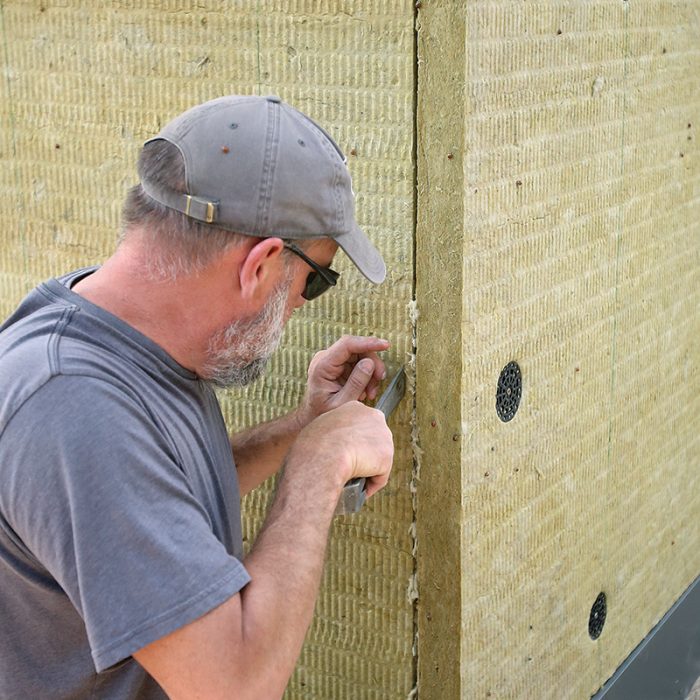
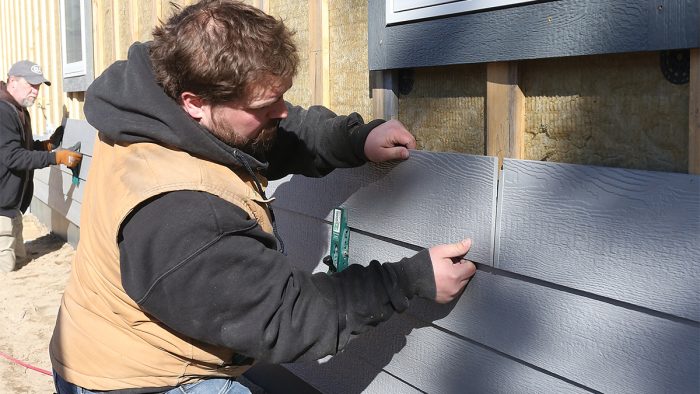
Flat Walls Are the Goal
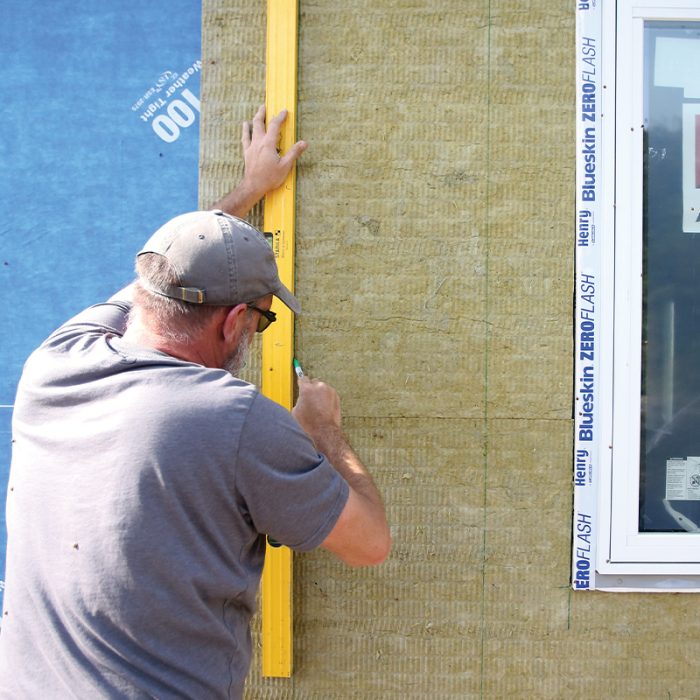
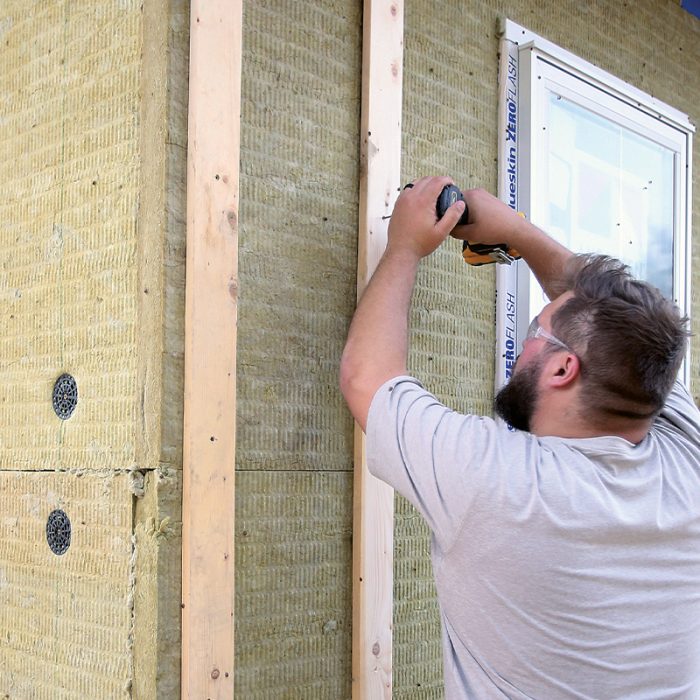
When the time came to install the insulation, we temporarily fastened the Rockwool ComfortBoard to the wall with screws and washers. It is really the 1×4 rainscreen strapping, however, that will permanently hold the CI in place. We needed the ¾-in. strapping to be fastened through the insulation and sheathing and project a minimum of 1 in. into the framing of the building. Simple math gives us fastener length, but size and spacing are based on the weight of the siding. All these specifications can be found on the Rockwool website.
The density of ComfortBoard can make it difficult to keep the strapping flat on the wall. It is easy to overdrive the strapping fasteners and create waves in the strapping that could project through the siding. To make sure this wasn’t a problem, we adjusted the screws securing the strapping in or out, using a long straightedge and a stringline to ensure a flat surface.
While normal screws work well for drawing the strapping in, a screw with a reverse-threaded head (also known as a shim screw) is usually required to bring it out. The Rothoblass DRS spacer screw and the GRK Topstar are the two screws that work well for this task. It took two of us about an hour to complete the process on a 36-ft.-long by 9-ft.-tall exterior wall.
A rainscreen is an important detail with a lot of benefits, but a ¾-in. air space behind the cladding can be a problem if bugs and other critters are able to enter. At the bottom of the wall, we used rips of aluminum window screen to keep critters out. If we were building in a wildland-urban interface (WUI) area, this detail would have required a specific product to keep embers from flowing into the cavity in the event of a wildfire.
On this building, the air space extends all the way into the vented attic. We did this by installing the F-channel that would capture the soffit material over the rainscreen strapping. If we did not connect the rainscreen to the attic, we would need to create another pathway for the rising air to exit the space behind the wall cladding.
This is typically accomplished by creating a gap where the cladding meets the soffit, requiring a second bug screen. But the building codes in some areas don’t allow this alternate approach (requiring that the rainscreen not be connected to the soffit), so check your local regulations.
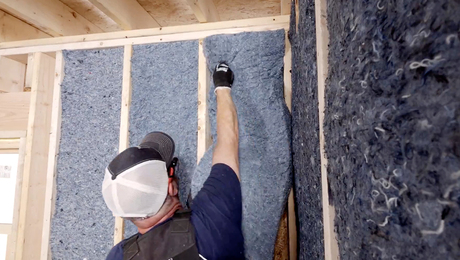
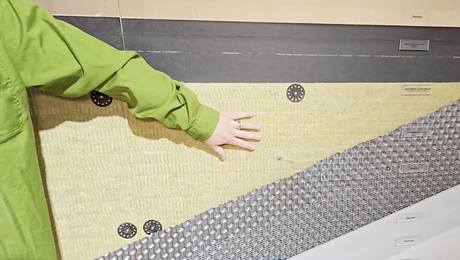
A Cozy CI SweaterA thick layer of continuous, high-density rigid mineral-wool insulation eliminates thermal bridging and controls the temperature of the sheathing. 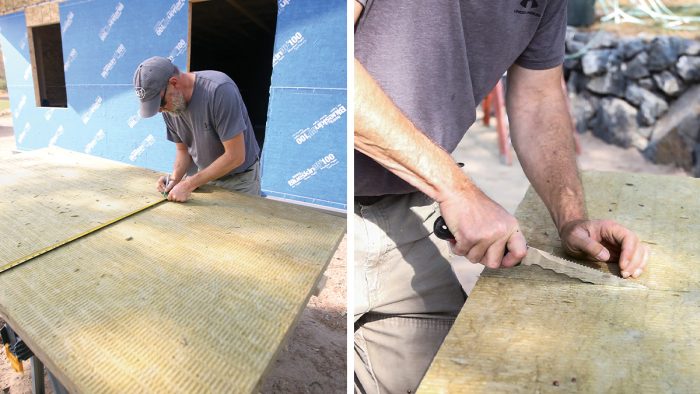 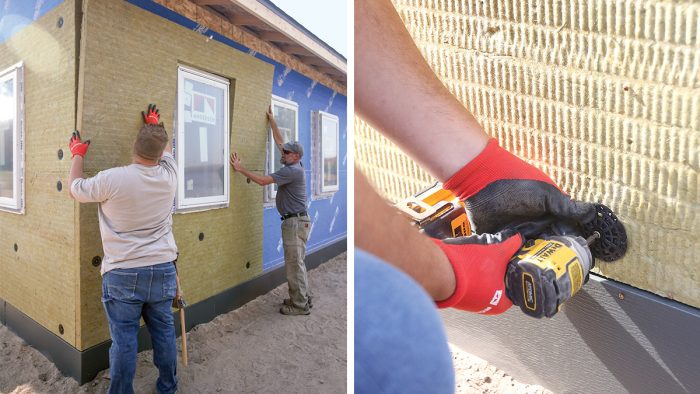
|
Blower Doors Don’t Lie
After the windows and doors were installed, we performed a mid-build blower-door test. The goal of this test was to verify that we had hit our air-sealing goal, which was 1 ACH50 or less. The test result was 0.30 ACH50, which is 0.019 CFM per sq. ft. of surface area, or 60 CFM50. These were my personal best blower-door results. All the aforementioned details for this wall led to those numbers, but the continuity of the air barrier is a key piece.
I have been involved in several high-performance construction projects over the past few years. While all have resulted in a small increase in budget, each has also yielded operating cost reductions, added durability, and reduced maintenance costs. There is also the intangible added value of comfort—these homes are quiet, with consistent temperatures.
With a practical approach to high performance, additional upfront costs are offset by long-term value. So take this project as an example that any builder who wants to move toward building better can accomplish the goal. In the words of Joe Lstiburek, it’s building science, not rocket science.
— Randy Williams is editor at Green Building Advisor and a home energy auditor and contractor in Grand Rapids, Minn. Photos by Brian Pontolilo.
RELATED STORIES
- 5 Lessons from Building in a Cold Climate
- Crash Course in Control Layers
- The Complicated Role of a Water-Resistive Barrier
Fine Homebuilding Recommended Products
Fine Homebuilding receives a commission for items purchased through links on this site, including Amazon Associates and other affiliate advertising programs.
Stabila Extendable Plate to Plate Level
Foam Gun

Guardian Fall Protection Pee Vee


