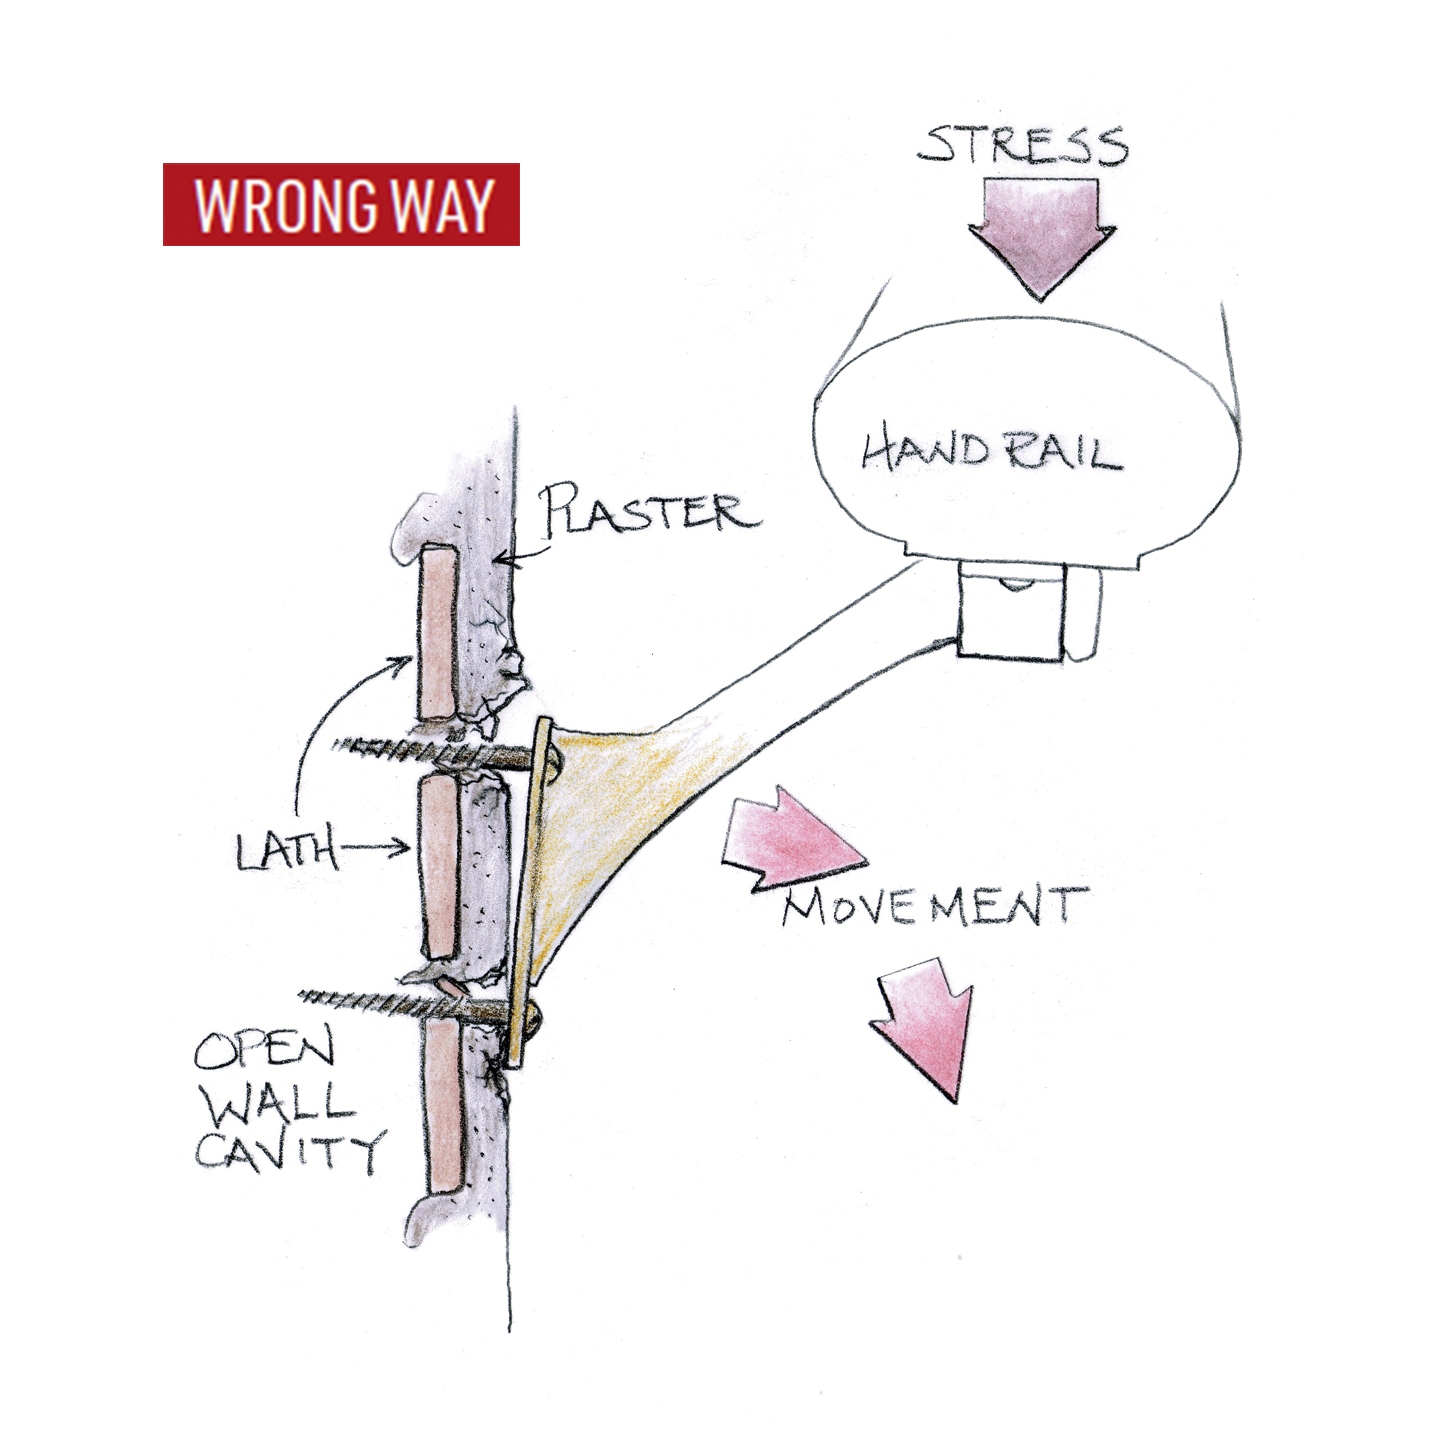
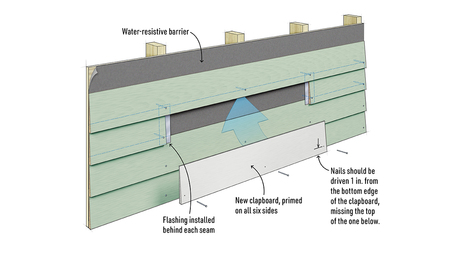
Rainscreen for Cedar Shingles
Create a crisscross rainscreen with vertical and horizontal furring strips to provide proper drainage, ventilation, and nailing support over continuous insulation.

My wife and I own a small cottage-style lake house in climate zone 5a. We’re planning on re-siding, reroofing, and installing new windows this year, and I would like to make some performance upgrades in the process. On the walls, I am thinking about adding continuous exterior insulation over a peel-and-stick WRB, finished with natural cedar shingles. I know wood claddings perform better and last longer when installed over a rainscreen. What is the best way to incorporate a rainscreen when installing shingles over continuous insulation?
— R.Y.; Harveys Lake, Pa.
Associate Editor Grant Baver Replies
When installing wood shingles on a rainscreen over continuous insulation, the biggest challenge is having something for the shingles to attach to. When shingles are installed directly over sheathing, the sheathing provides a nailer wherever the shingles land.
Unfortunately, once you add continuous insulation, attaching the shingles to the sheathing becomes ineffective. Nails cannot provide enough strength to secure the shingles through the insulation. You must provide another nail base, outward of the insulation. Unlike common siding materials, which have long lengths running horizontally, vertical furring strips don’t provide nailing where it is needed for shingles.
Potential Solutions
To address this, you have two main options that could provide this secondary nail base. The first is either to install a second layer of sheathing over the exterior insulation or to use a nailbase panel, which combines the insulation and sheathing in one product. (Huber’s Zip R-Sheathing is a readily available nailbase panel.)
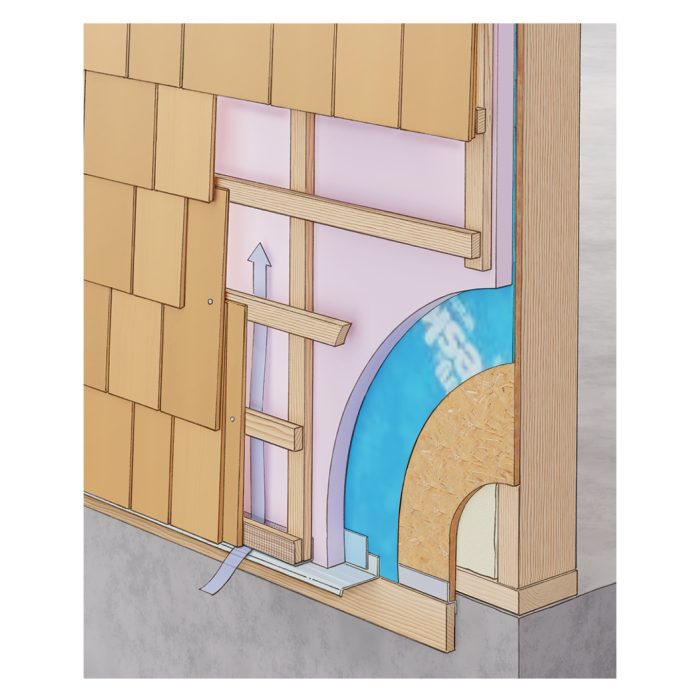
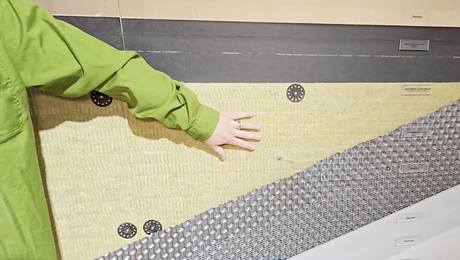
This option provides a surface that offers nailing pretty much anywhere and allows the rest of the work to continue almost exactly as if there were no continuous insulation layer. After you install and detail the WRB, windows, and flashings as usual, a woven rainscreen product can be used to create the rainscreen gap behind the wood shingles.
These woven rainscreens come on a 3-ft.- to 4-ft.-wide roll and are made from either semi-rigid expanded synthetic mesh or a rigid plastic grid that when installed will hold the siding away from the sheathing, creating a gap. There are quite a few woven rainscreens on the market, including Keene Driwall, Benjamin Obdyke Slicker, and Benjamin Obdyke AeroNet.
Using a product that creates at least a 3/8-in. gap will help you achieve better rainscreen performance by providing both drainage and ventilation, although ¼-in. products are also common and still create a well-performing drainage space.
Another Approach
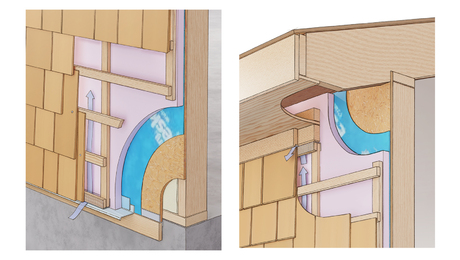
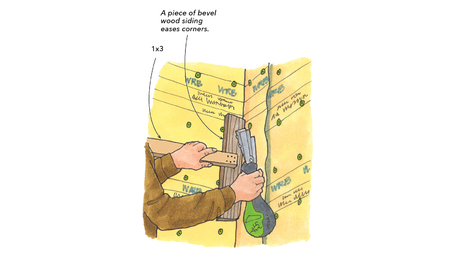
The second option is to create a “crisscross” rainscreen. This involves first installing furring strips vertically over the insulation to create the drainage plane, and then fastening horizontal furring strips to the face of the vertical strips to provide nailing for the shingles. Since using only horizontal strips would cut off the vertical drainage path of the rainscreen, adding the first layer of vertical strips is essential.
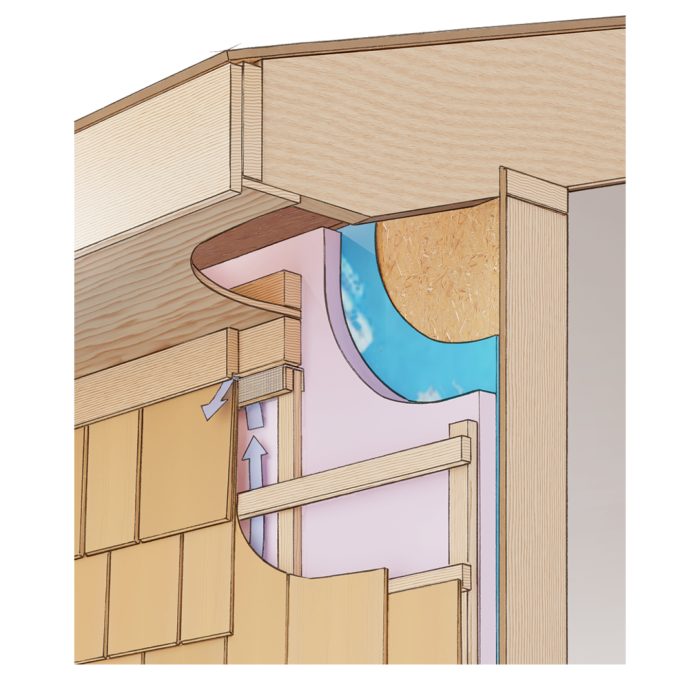
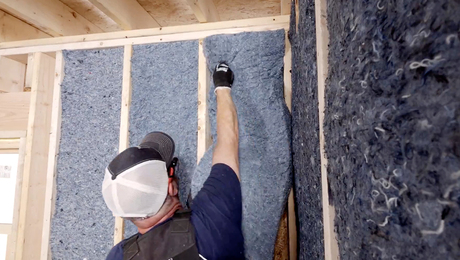
This method can work well, especially if you are installing shingles with a large exposure, as the number of horizontal rows of furring is reduced. Another benefit of this method is that it allows you the opportunity to keep your assembly vapor open by using a permeable peel-and-stick WRB/air barrier in conjunction with a permeable insulation (such as Rockwool or Timber HP), which becomes very important if your existing assembly has a class I vapor retarder such as sheet poly on the inside walls.
Additionally, this method creates what is known as a ventilated rainscreen, as the drainage gap created is large enough to promote the circulation of air behind the cladding. From a performance and durability point of view, this vented rainscreen is a good thing, as the air circulation will also keep the shingles dry from the inward side. It’s important to keep the top and the bottom of the rainscreen open. You can use any number of products to keep critters out, such as the insect screen shown in the drawing.
RELATED STORIES